Wired Green, Part 1: The Fragile Prototype
TLDR Summary
This post documents the raw prototype phase of my automated plant monitoring system built with an ESP32 and budget soil sensors. Expect a chaotic mix of early calibration struggles and the essential lessons learned before upgrading to premium components in (upcoming) part two. Dive in for the quick technical breakdown and the mistakes you definitely want to avoid.
Motivation
There's something about transition that rewires you from the inside. Not just emotionally, but in how you see the world and how much room you find in it for yourself. For years I'd been pulled toward growing something. A plant, anything alive, something that could rely on me. I liked the idea of being needed, of something being okay because I took care of it. But I couldn't let myself have it just for the sake of having it. Everything had to earn its place, every moment had to count toward becoming better at something. It's hard to give yourself permission for something that's only beautiful because you care for it — nothing more, nothing less.
When I came out as trans and found my own name, something else opened. Space to want things that don't have to be productive or strategic. Things that are just care. Simple, daily care. Beauty because it's beautiful. A fern because it's worth looking at and worth keeping alive. Not because it makes me better at anything, but because I wanted it.
I started with four ferns. And the moment I began reading about them, something clicked that I hadn't expected at all.
When a Fern Changed Everything
I wasn't looking for just any plant. I started researching ferns and was stunned by how many there were, how wildly different they could be — the textures, the shapes of the fronds, the way they grew. I fell down a rabbit hole searching for ferns that looked as different from each other as possible, and landed on four that simply took my breath away: Nephrolepis, Adiantum, Asplenium, Phlebodium. Their names became something important immediately, like learning a new language.
Ferns have hearts. At the center of each frond is a dark convergence point from which the plant's entire system grows. They don't like to be drowned — they want mist, moisture in the soil but never standing water. They love shade. They thrive exactly where other plants barely survive.
I lived in shadow for a long time. Before my transition I hid from the world and from myself, a quiet kind of surviving. So when I read that ferns genuinely prefer the dark, that they've built their entire biology around flourishing where other things suffocate, I felt something unexpected. Like these plants understood something about me. These weren't plants. These were my plants.
The Developer's Instinct
But here's the thing about being a developer who's also becoming a plant parent. You develop systems. You can't help it. When I started forgetting to water them, I didn't think "be more mindful." I thought "automate this."
And that's where we live now, isn't it? AI makes things possible that would've been completely out of reach. I didn't need to spend months fighting through documentation and prerequisites to earn the right to build something. I could ask questions and get real answers. I could write a few dozen lines of YAML instead of wrestling with low-level C++. The barrier to entry is still technically there, but it's not a wall anymore. It's just... shorter. Faster. Possible for someone like me.
So I decided to build a system. (AI would also give me at least one confidently wrong explanation along the way — but that's part of the story too.)
From Overwhelm to Understanding: Hardware
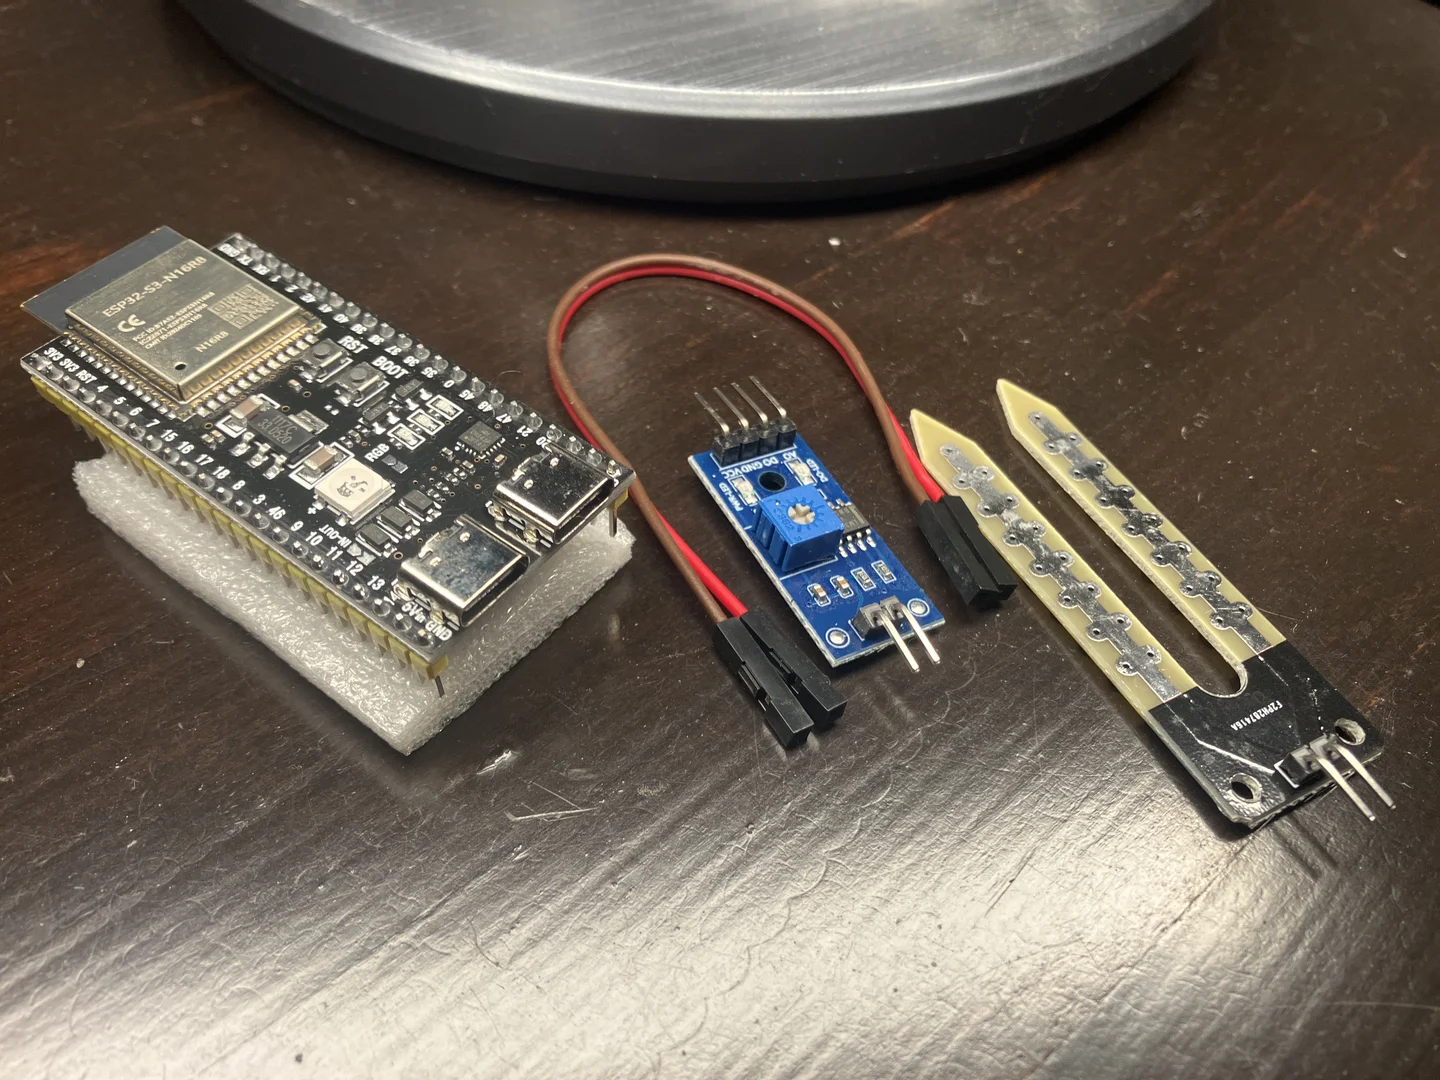
Here's what I actually needed to build this system:
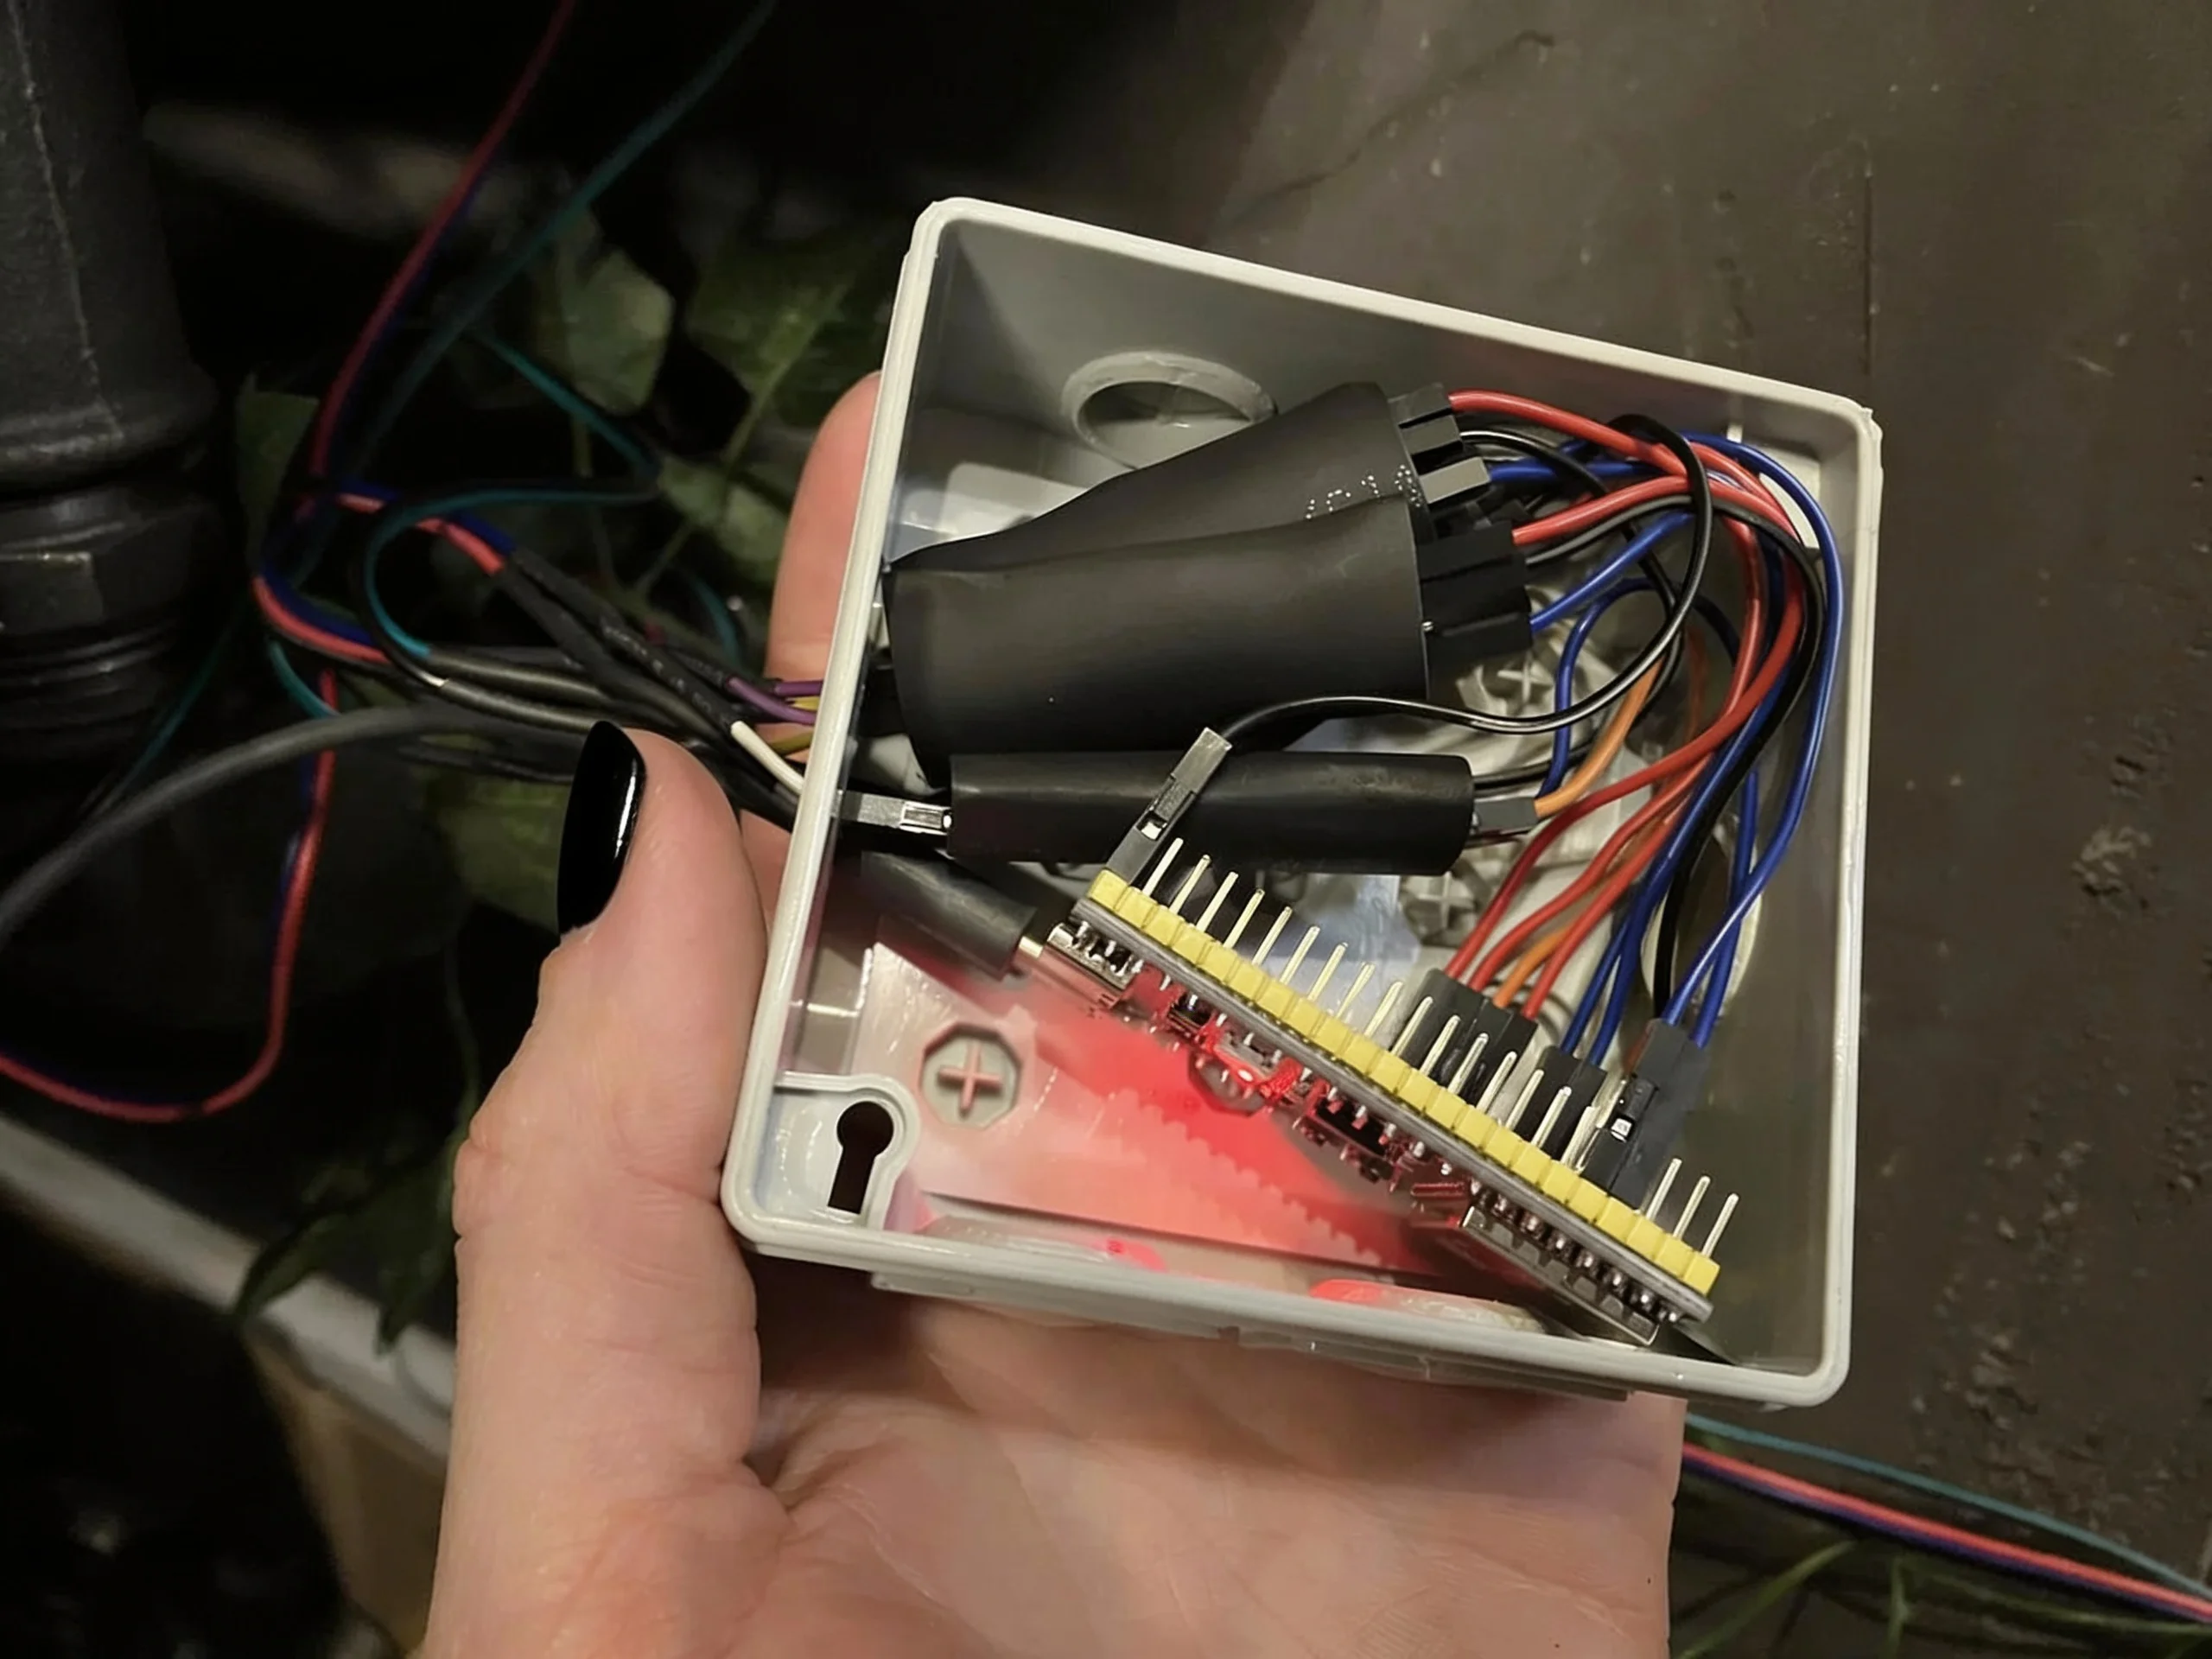
- ESP32 S3 Dev Board with WiFi — the brain (~$10)
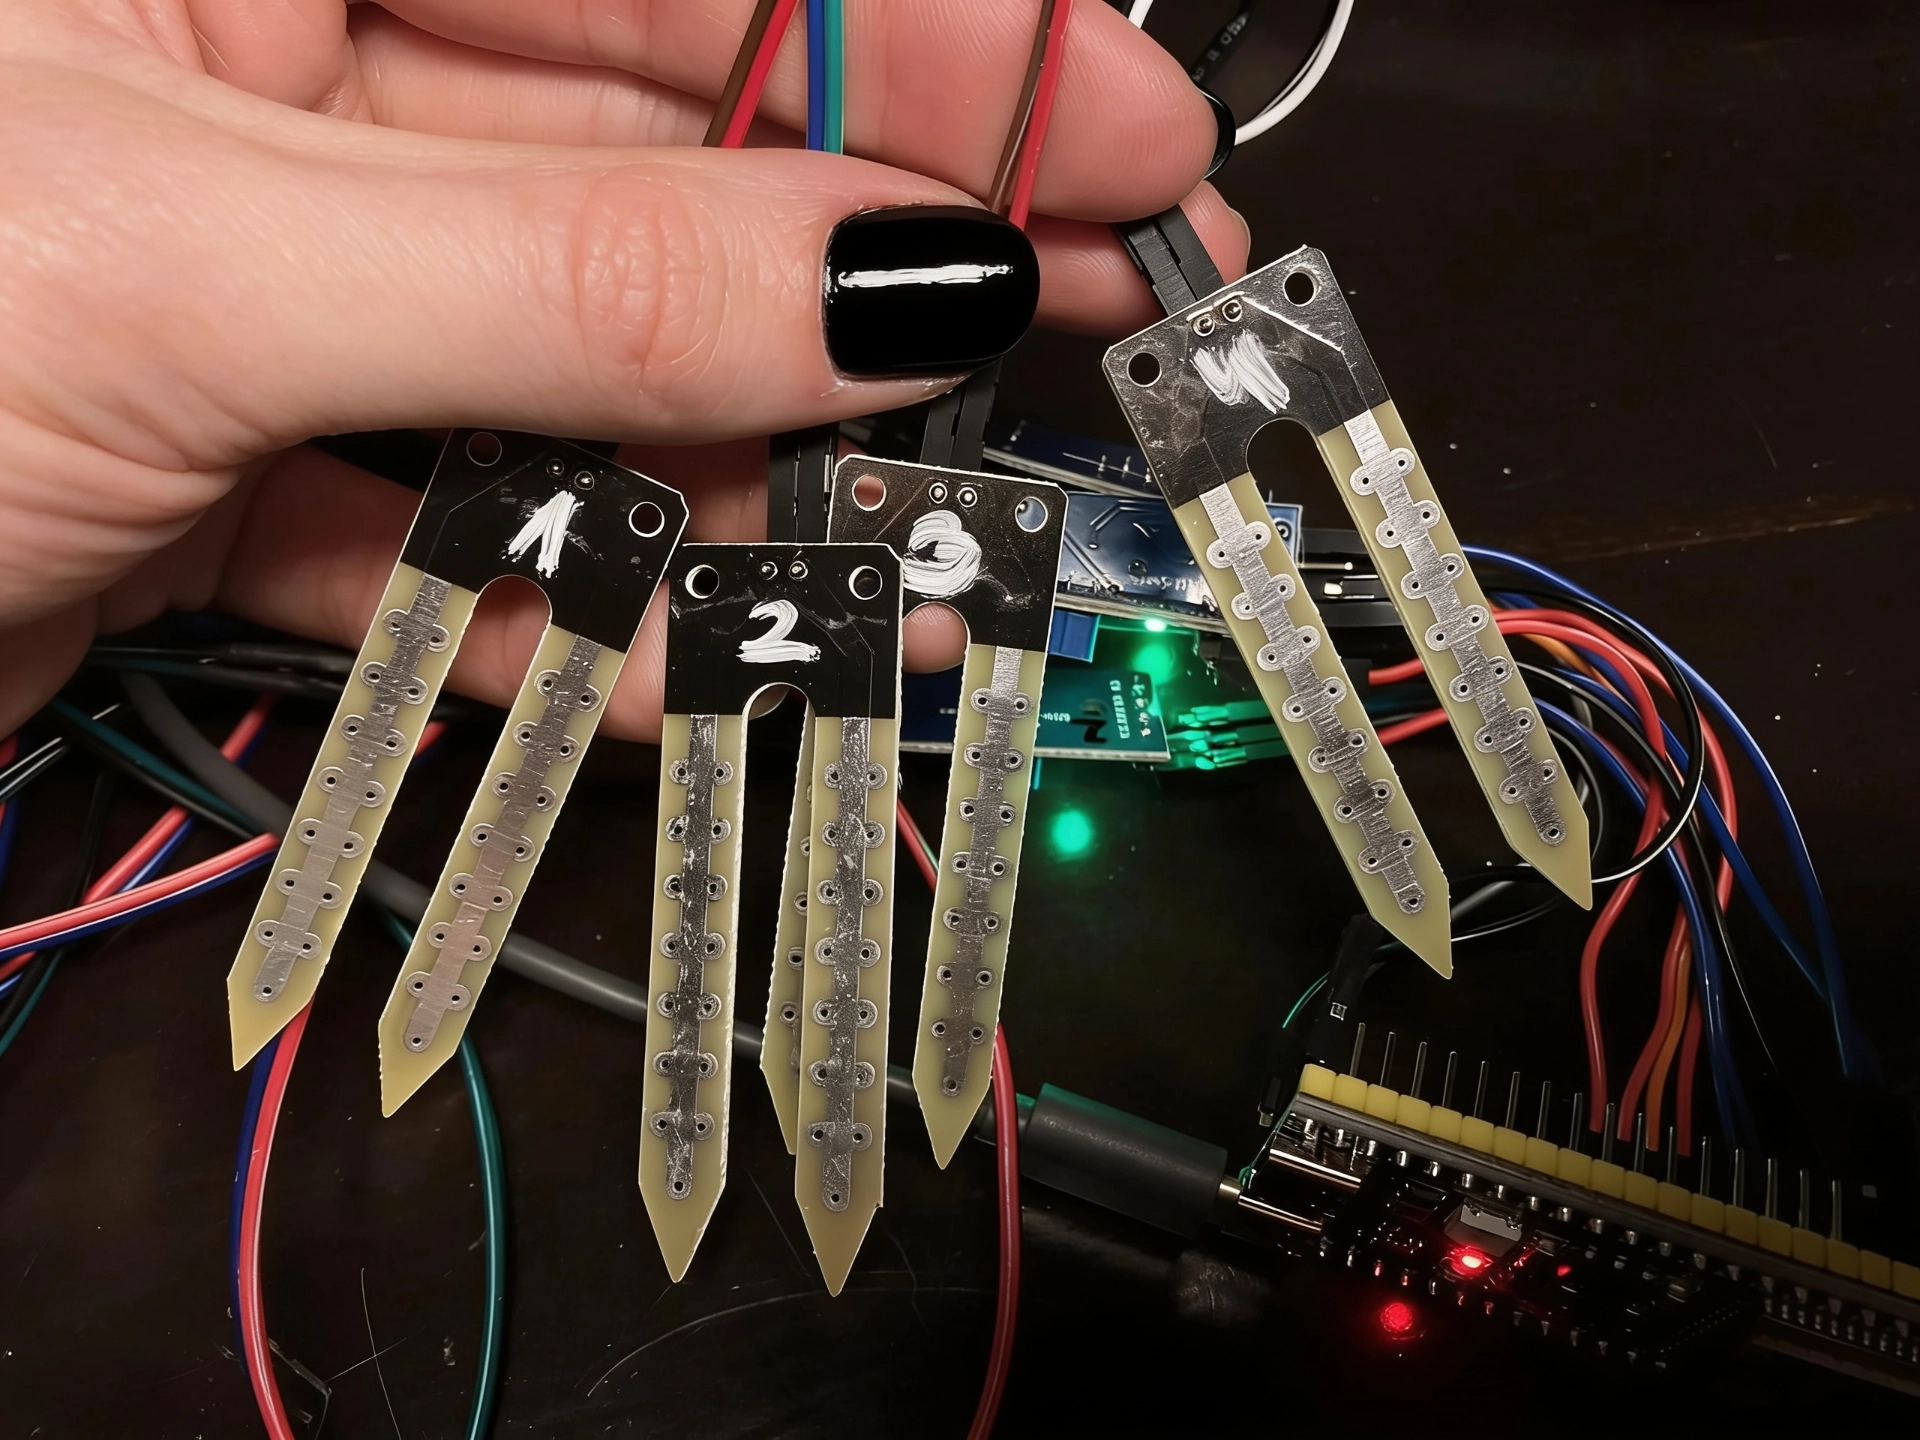
- Four Resistive Soil Moisture Sensors — the eyes in the dirt (~$5 for four)
- Dupont Jumper Cables — connectors (~$2)
- Home Assistant — which I already had
Total hardware cost (excluding HA): less than a nice plant pot.
One thing worth highlighting separately: power management. I came across a review explaining that sensors powered continuously cause electrolysis in soil over time, degrading it. So the ESP32 powers each sensor for 2 seconds during measurement, then cuts current immediately. About 3 minutes of runtime per day instead of 24 hours continuously.
The Wall: When You Don't Understand The Pins
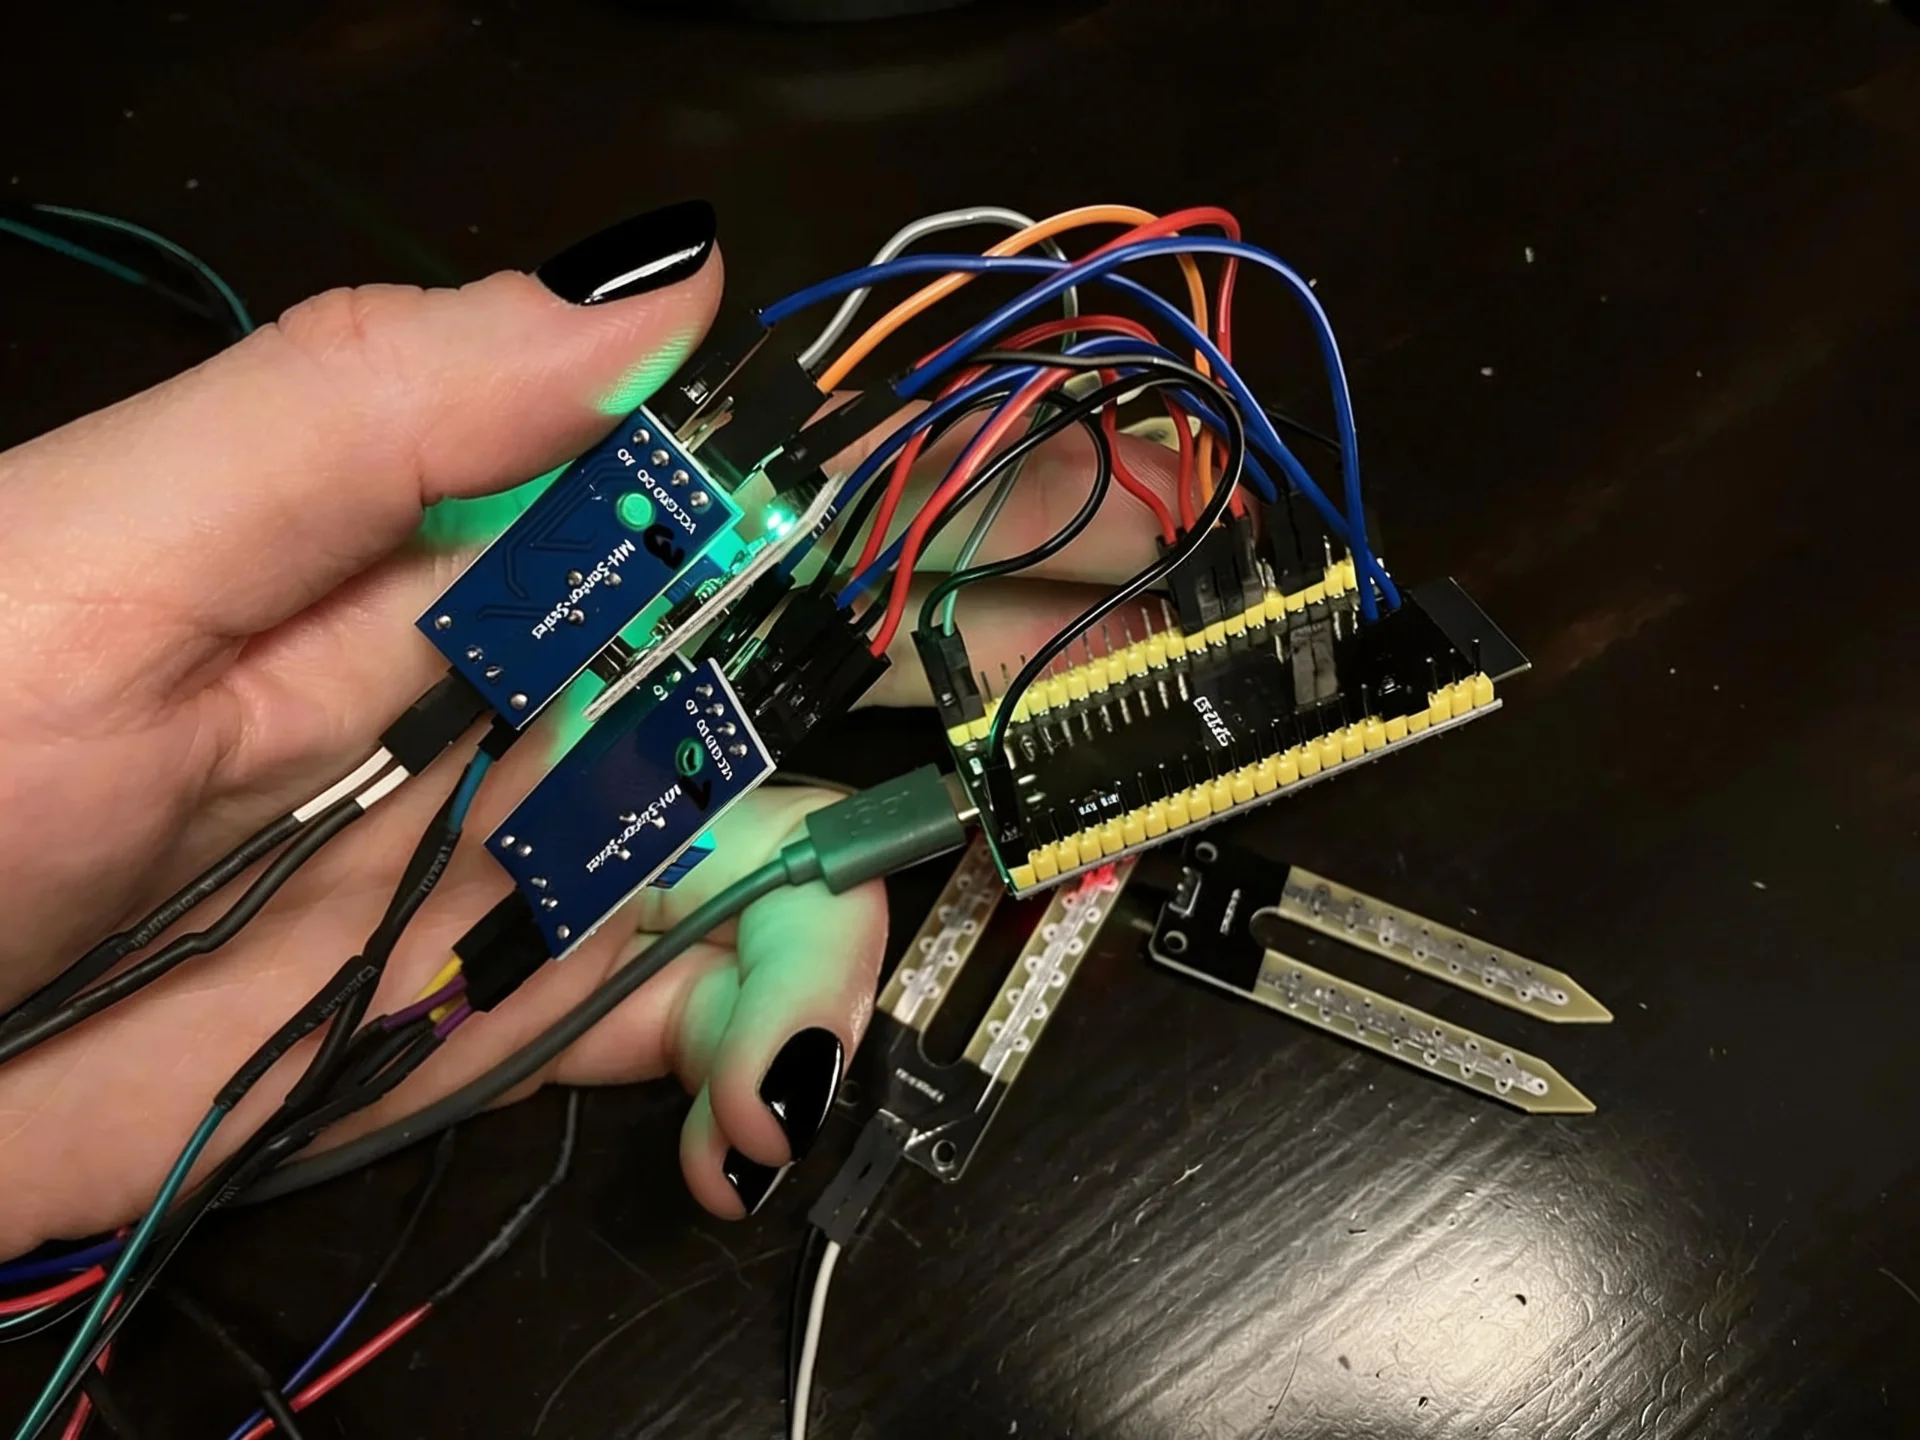
The ESP32 board has a lot of pins. Each one can do different things. And then there's the catch: not all pins do all things.
A Technical Note On GPIO Pins (For Me & For Others)
Why This Matters: Moisture sensors output a varying voltage — a smooth signal — so you need ADC (analog-to-digital converter) pins, not digital ones. On the ESP32-S3:
- Pins 1-10 (ADC1): Analog and stable even when WiFi is running. Use these for sensor readings.
- Pins 11-20 (ADC2): Share internal resources with the WiFi module. Noisy and unreliable while connected to Home Assistant.
- Pins 21+: Purely digital. Perfect for switching sensors on and off, useless for measuring voltage.
I used GPIO1, GPIO2, GPIO4, GPIO5 for moisture readings (safe ADC1 block). GPIO38–41 for sensor power switches. Clean wiring, no surprises.
Setting Up ESPHome in Home Assistant
I want to share the exact path I walked, because when I was figuring this out I really wanted someone to just tell me where to click.
Step 1: Install the ESPHome Add-on
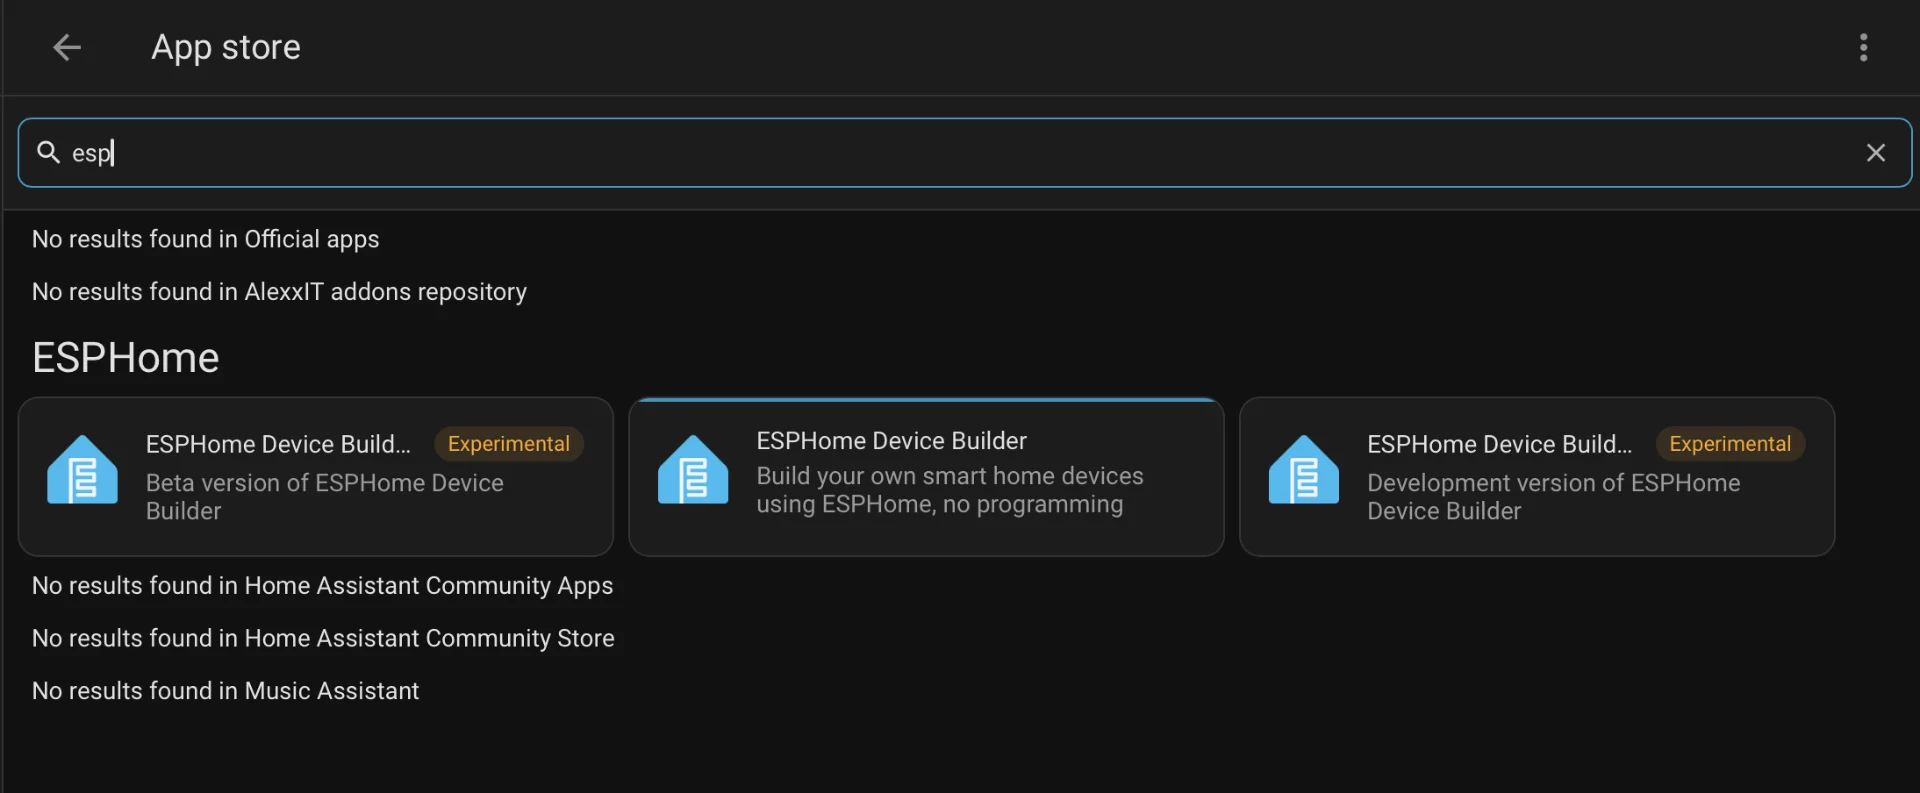
In Home Assistant: settings icon in the bottom left → Add-ons → blue Add-on Store button in the bottom right. Search ESPHome, click ESPHome Device Builder. Install, enable Show in sidebar, click Start.
Step 2: Create Your Device and Add Sensors
In the ESPHome panel: New Device. Name it (like plant-humidity-monitor, avoid underscores — they can cause DHCP issues), pick ESP32-S3, add WiFi credentials. Then click EDIT and add the sensor configuration at the end of the file:
# Power control - keeps sensors from corroding
switch:
  - platform: gpio
    pin: GPIO38
    id: power_sensor_1
    restore_mode: ALWAYS_ON
  - platform: gpio
    pin: GPIO39
    id: power_sensor_2
    restore_mode: ALWAYS_ON
  - platform: gpio
    pin: GPIO40
    id: power_sensor_3
    restore_mode: ALWAYS_ON
  - platform: gpio
    pin: GPIO41
    id: power_sensor_4
    restore_mode: ALWAYS_ON

# Voltage readings - ADC1 pins, stable with WiFi
sensor:
  - platform: adc
    pin: GPIO1
    name: "Soil Moisture 1 Voltage"
    update_interval: 2s
    attenuation: 12db
    id: moisture_sensor_1
    unit_of_measurement: "V"

  - platform: adc
    pin: GPIO2
    name: "Soil Moisture 2 Voltage"
    update_interval: 2s
    attenuation: 12db
    id: moisture_sensor_2
    unit_of_measurement: "V"

  - platform: adc
    pin: GPIO4
    name: "Soil Moisture 3 Voltage"
    update_interval: 2s
    attenuation: 12db
    id: moisture_sensor_3
    unit_of_measurement: "V"

  - platform: adc
    pin: GPIO5
    name: "Soil Moisture 4 Voltage"
    update_interval: 2s
    attenuation: 12db
    id: moisture_sensor_4
    unit_of_measurement: "V"
Key detail: attenuation: 12db lets the ADC read the full 0–3.3V range. Without it, readings cap at 1.1V and you see nothing useful. The GitHub repository has three complete configurations: debug.yaml (raw voltage for testing), live.yaml (2-second refresh for calibration), and prod.yaml (15-minute intervals with full power management).
Step 3: Compile Locally, Not on Home Assistant
Home Assistant Green is wonderful. Except when compiling ESPHome firmware — that takes over 10 minutes per cycle. Change something, compile, wait, find a mistake, start over. Genuinely demoralizing.
Compiling locally on my MacBook M4 Pro through the terminal:
pip3 install esphome
esphome run plant_humidity_monitor-prod.yaml
Three minutes. That doesn't sound like a revelation until you realize three minutes means you can try three things before HA Green finishes one. It changed "I'll try that tomorrow" into "I'll try three things right now." The speed of iteration changed the entire mindset.
One gotcha: secrets.yaml must be in the same folder as your config locally (ESPHome can't access HA's secret vault). And make sure no other application is holding the USB port — you'll get "Resource busy" and spend half an hour figuring out why.
Step 4: Flash and Connect
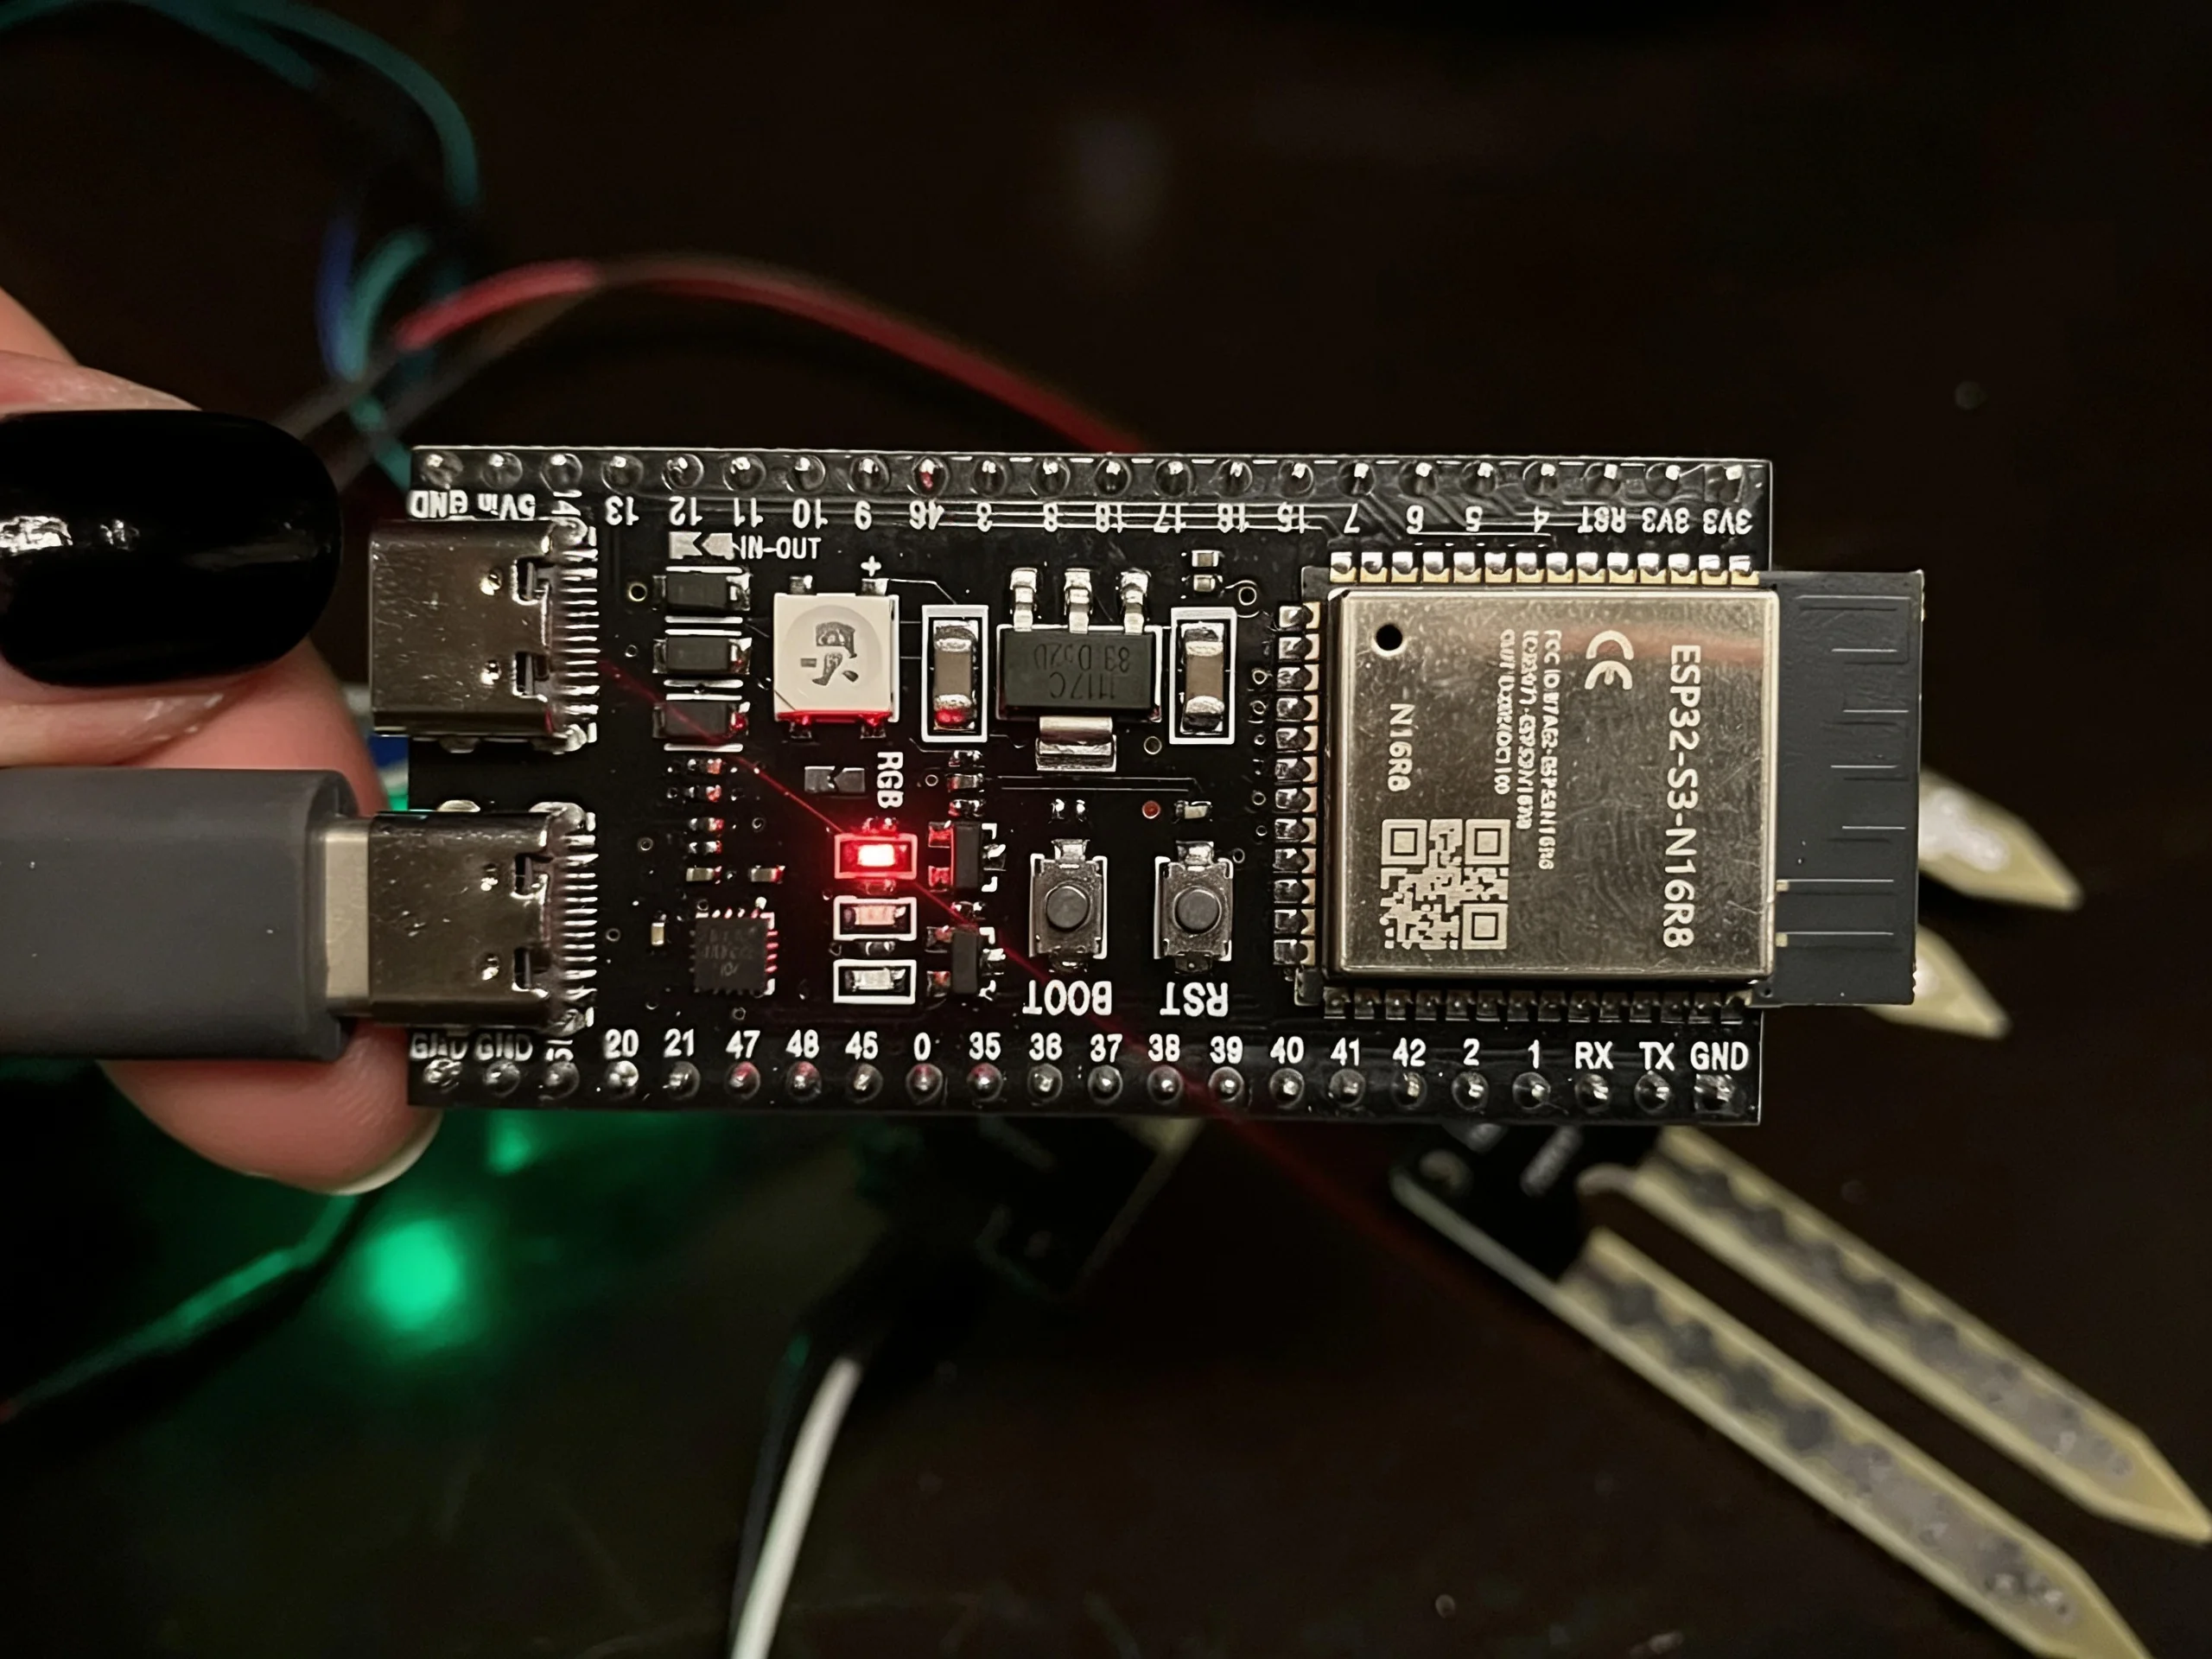
Connect the ESP32 to the bottom USB-C port (the one with CH343P next to it). In ESPHome: three dots → Install → Plug into this computer. After flashing, the board connects to WiFi and HA shows a "New device discovered" notification. Your sensor entities will appear in Settings → Devices & Services.
Calibration: Where the Real Work Happens
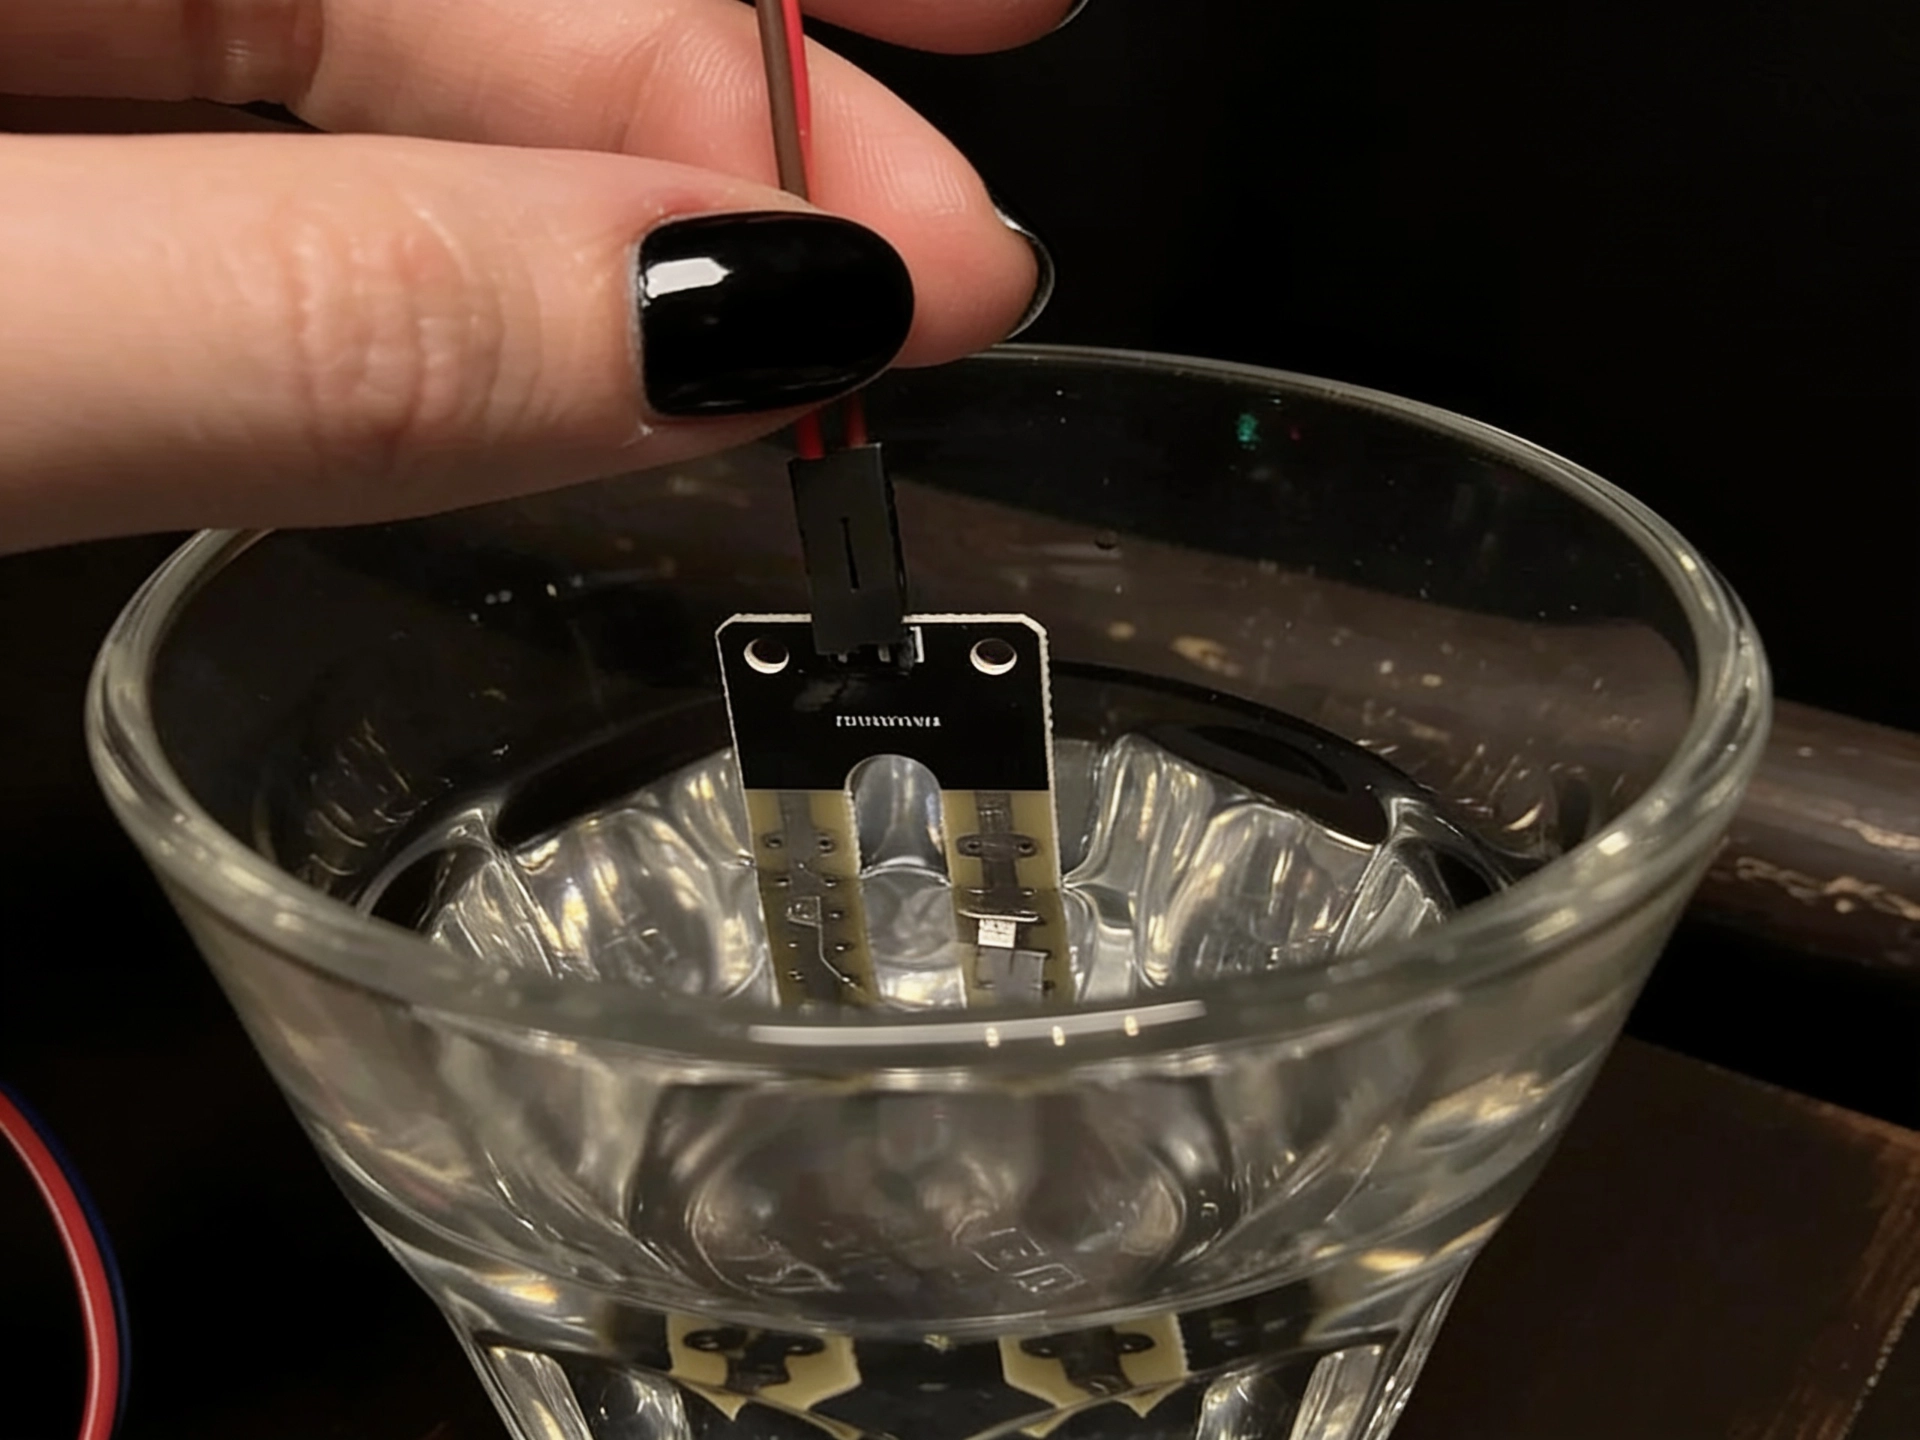
The sensor doesn't measure moisture directly. It measures voltage — a number between 0 and 3.3 volts. Home Assistant needs to know what that voltage means in percentages, and calibration is how you tell it.
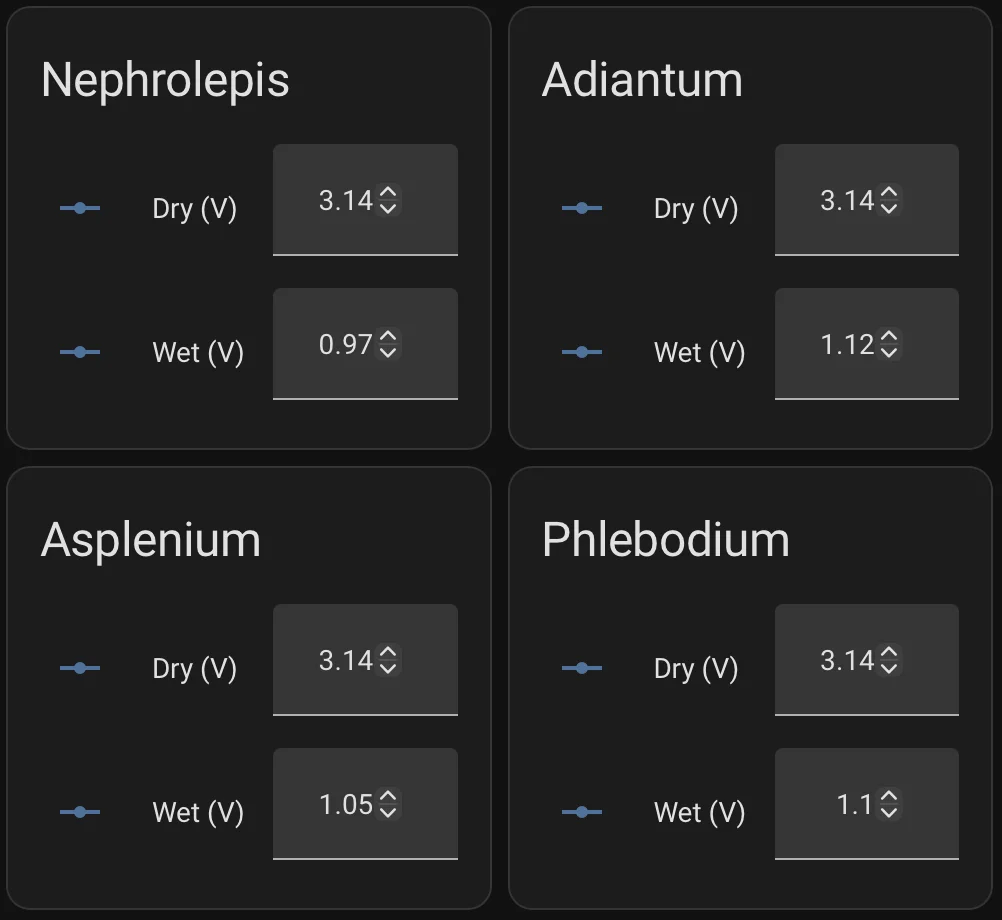
In theory: dry in air gives high voltage (~3.14V), water gives low voltage (~0.97V), linear interpolation between. Simple. Real soil doesn't work that way.
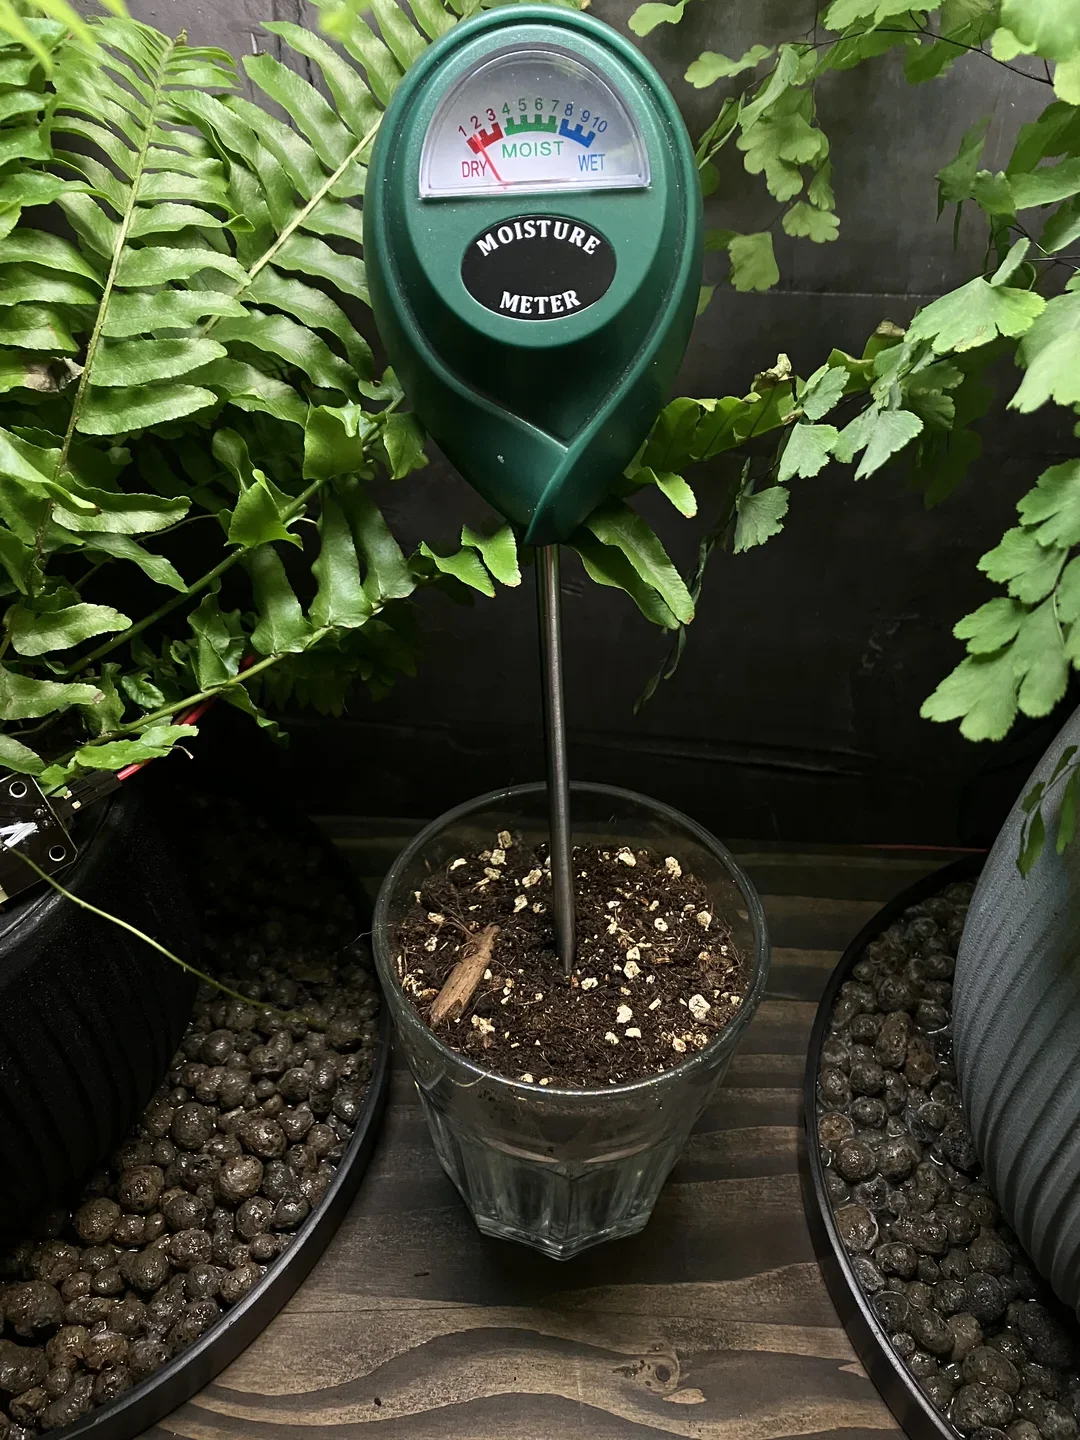
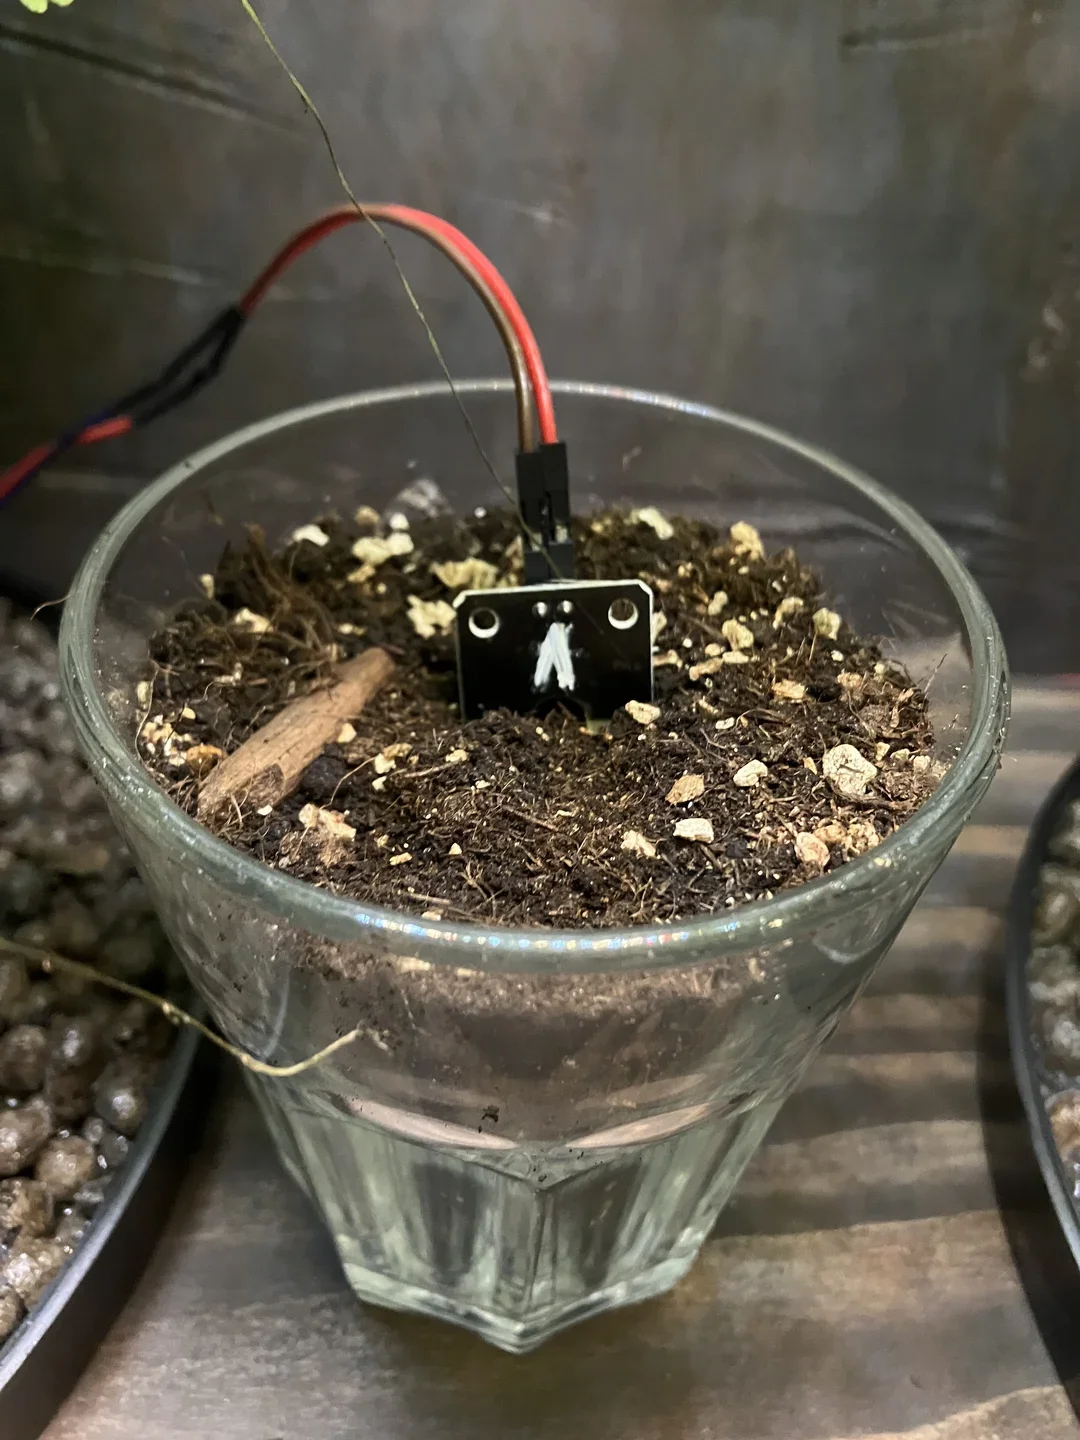
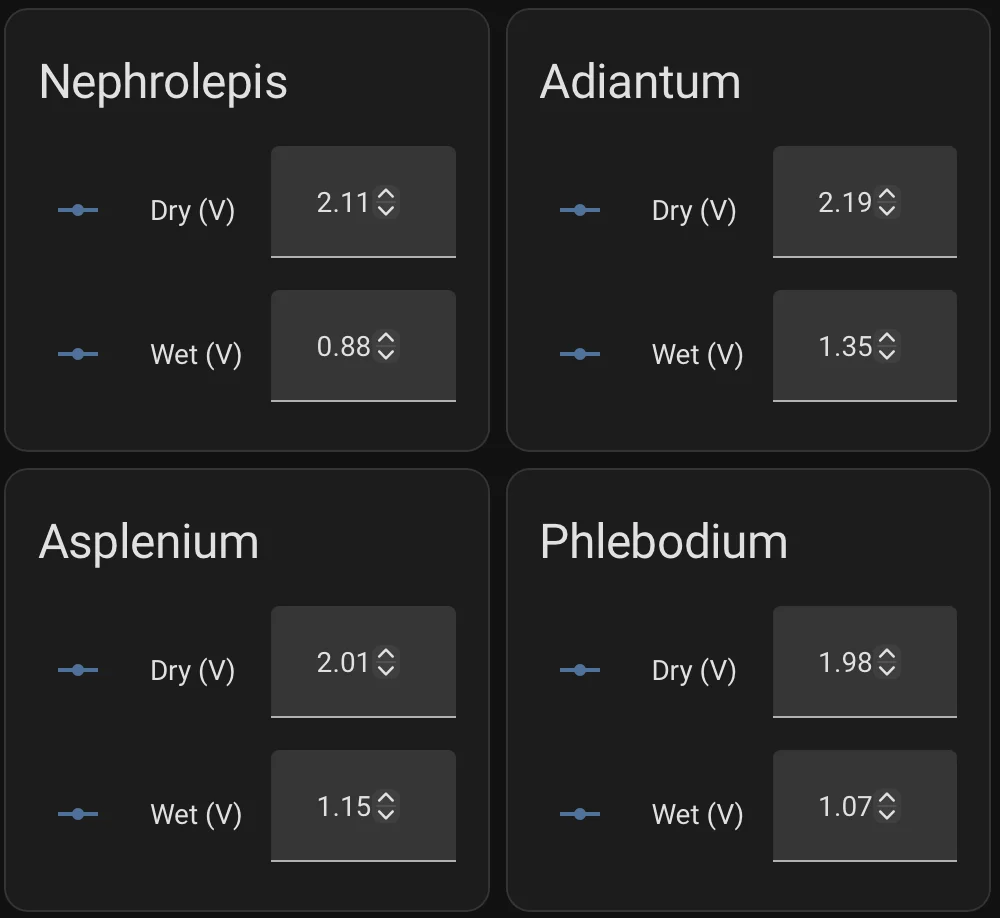
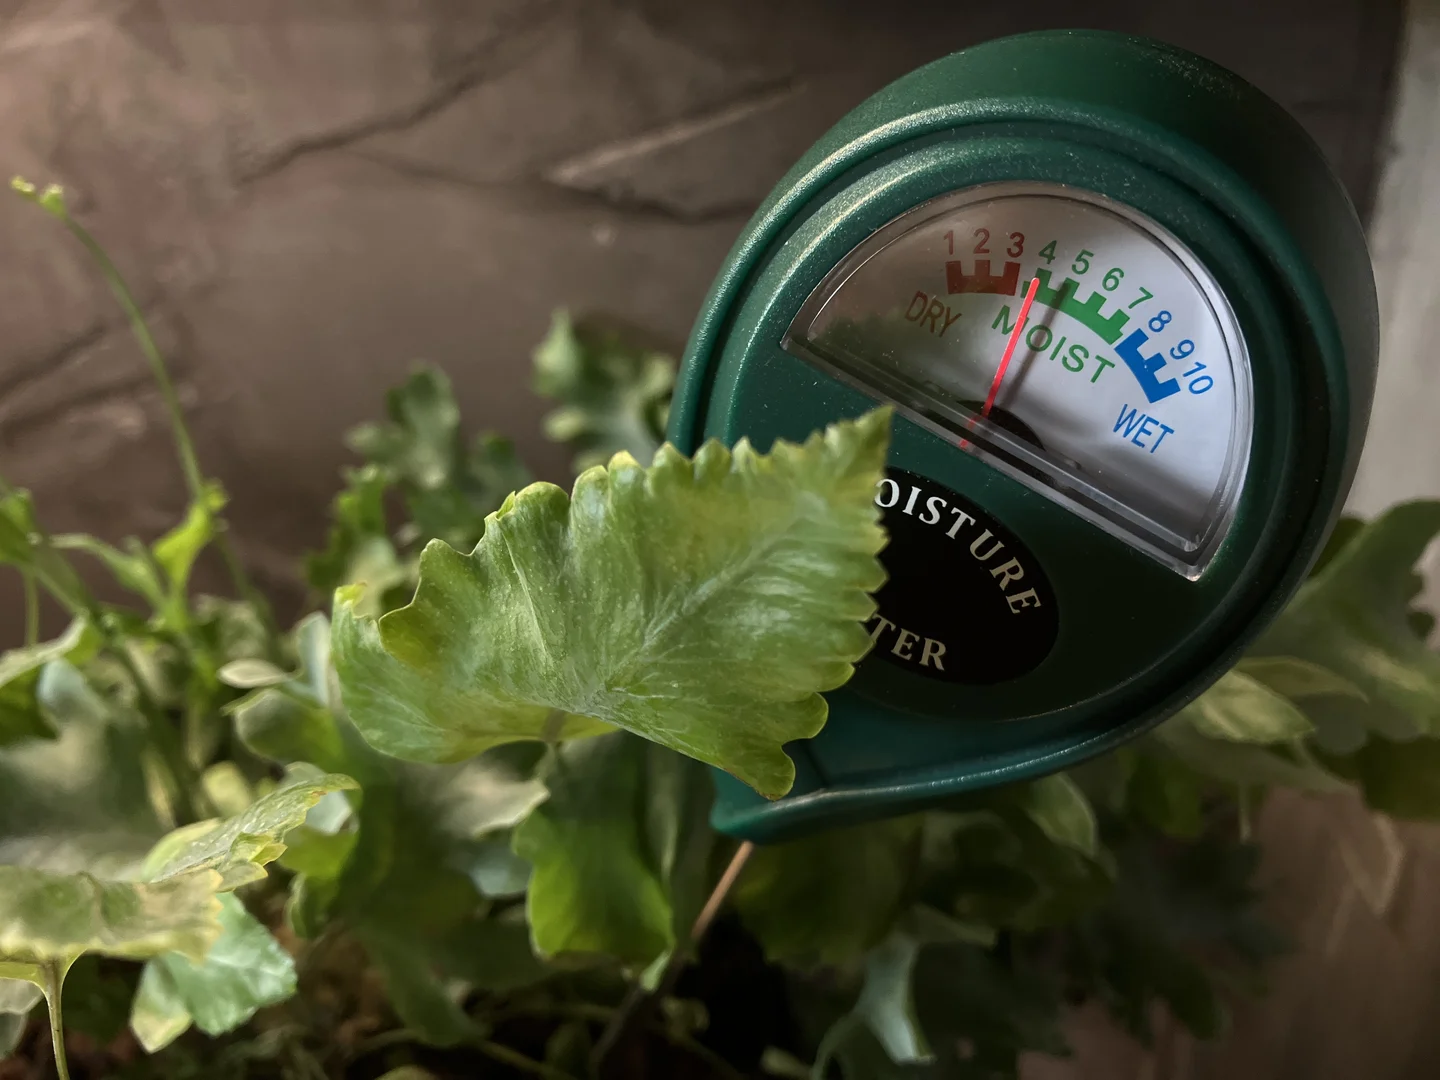
I also had a physical hygrometer — one of those green plastic sticks with a dial. When I compared its readings to my electronic sensors, they didn't agree at all. Nephrolepis: 99% on the sensor, 6/10 on the stick.
I asked AI to explain the discrepancy. It gave me a beautiful, confident explanation about dielectric permittivity and electric fields — which, I later discovered, describes capacitive sensors. What I actually had were resistive sensors. They work by pushing electrical current between two metal probes; wet soil conducts better (lower resistance), dry soil resists more (higher voltage). The physical stick does the same thing. They disagreed simply because they use different probe geometry and arbitrary scales — not because they measure fundamentally different things.
I didn't catch the mistake at the time. I had no reason to. The system seemed to work, the readings were plausible, and the AI explanation sounded thorough. That misunderstanding would quietly shape how I interpreted everything that followed.
The calibration process itself still holds: for each plant, I dried a sample of my exact soil mix completely (2 days), then watered thoroughly and recorded the voltage 15 minutes later. Each fern got its own values in ESPHome's calibrate_linear filter.
One thing that genuinely required recalibration: cable length changes readings. Moving from desk testing (0.5m cables) to final installation (2.5m cables) shifted the voltages noticeably. Final calibration must always be done with actual cables in place, not on your desk during testing.
The Mystery: Moisture Drops Too Fast
Everything configured. Hardware connected, firmware flashed, HA linked, calibration done, sensors in their pots.
Sensor 1: 90% after watering. Stable, slowly dropping as expected. Sensors 2, 3, 4: 90% after watering. By evening: 30%. By morning: 0%. The dashboard told me three of my ferns were dying of thirst when the soil was still visibly wet.
Software fine — the ESP32 was reading and sending correctly. Hardware fine — each sensor tested perfectly in a glass of water. And yet three of four sensors reported catastrophically wrong readings in actual soil. This is the debugging moment where you start questioning your sanity.
The Plot Twist: It Was Always the Air
Here's what I didn't know about peat soil. It shrinks as it dries. Not metaphorically — it physically contracts. And as it contracts, it pulls away from everything embedded in it, creating microscopic air pockets around the sensor probes.
Resistive soil sensors — the kind I had — measure electrical conductivity. For that to work, current must flow between the two metal probes through the soil. Air is a perfect insulator. Even a tiny air gap is enough to break the circuit completely. The sensor sees nothing. Reports zero. Doesn't matter that the soil five millimeters away is still perfectly moist.
Three of my sensors had developed air pockets where the peat had contracted. Not broken. Not misconfigured. Just physics meeting the wrong hardware.
The fix was immediate: pull each sensor out and press it back into fresh soil with solid contact.
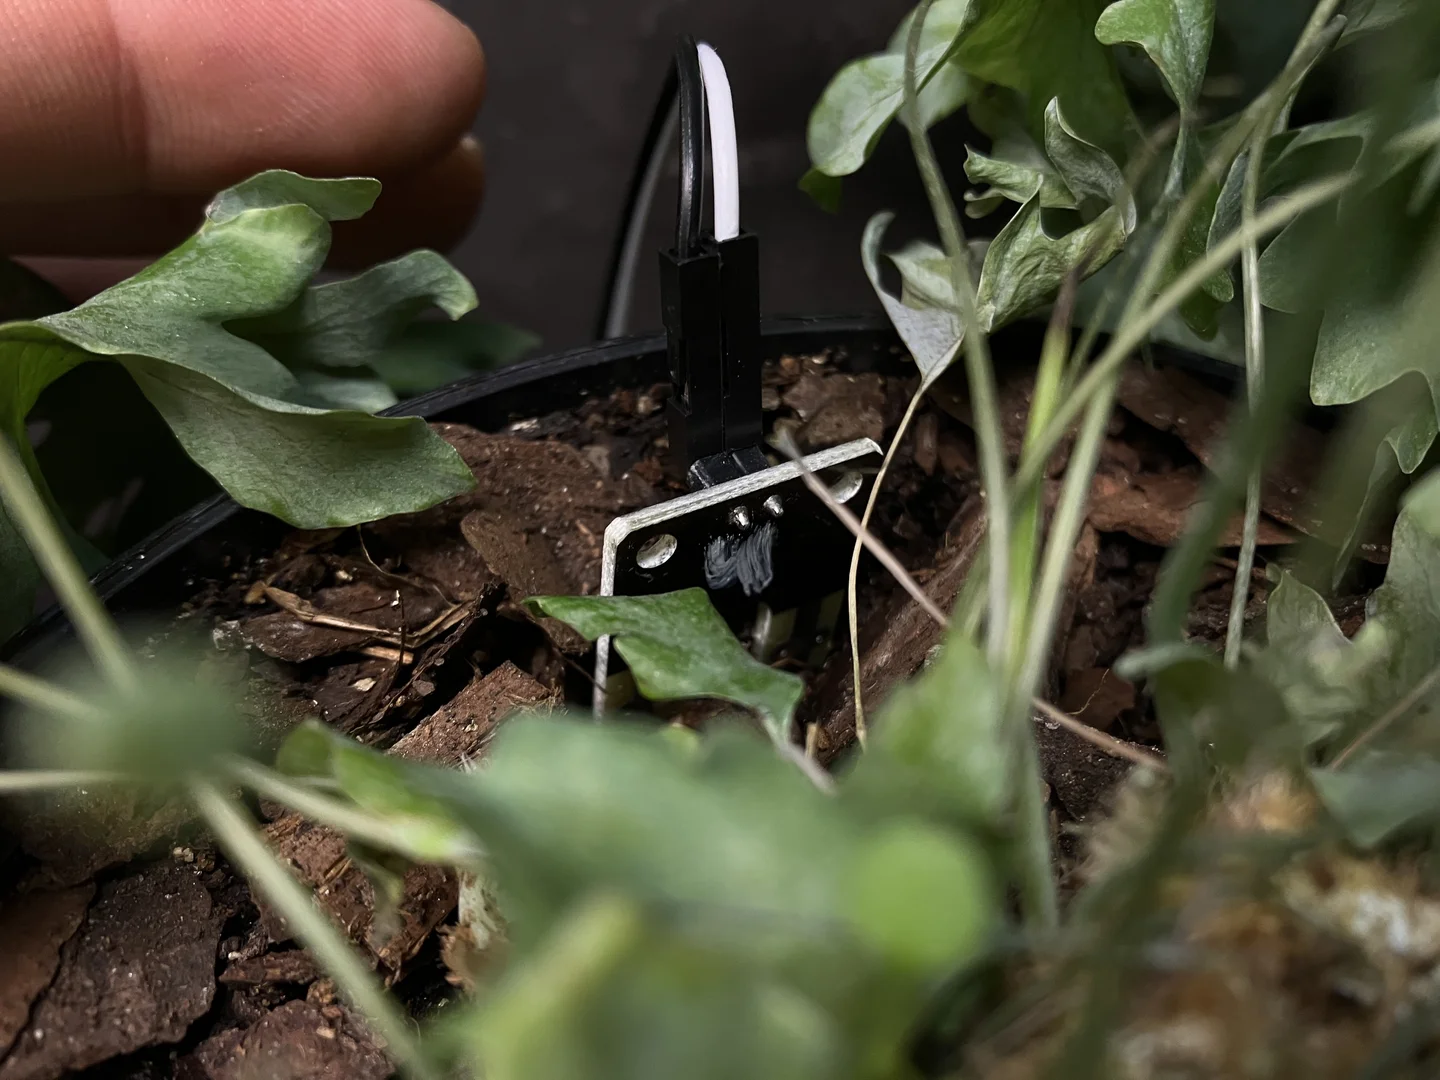
All three sensors came alive instantly. Values started moving, percentages updating, the dashboard lit up with actual data.
The uncomfortable part: this is a known limitation of resistive sensors in shrinking substrates. A capacitive sensor emits an electric field that reads through small air gaps — the problem would have been much smaller. But I had resistive sensors, an AI that described the wrong physics, and no reason to doubt it. So I pressed them back in, felt clever about the debugging, and moved on.
And real-world systems don't care about your elegant theory. They care about what actually happens in that specific soil, with that specific hardware, in that specific room.
The Final Setup: A Dashboard That Actually Works
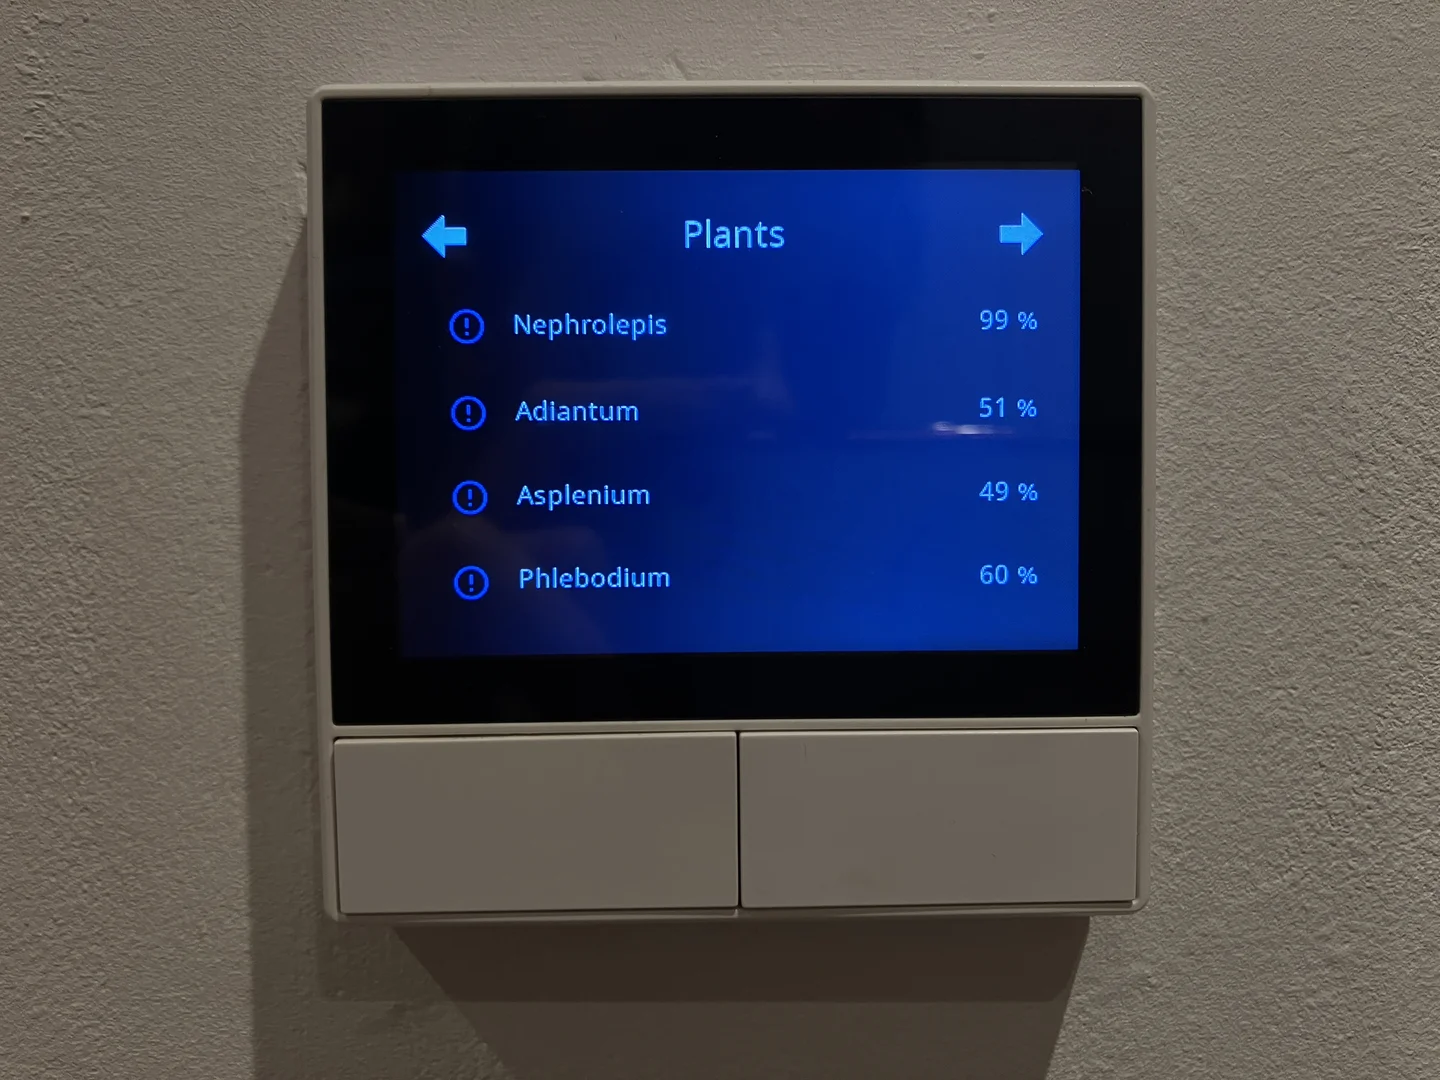
Four ferns, each with their own entity in Home Assistant showing moisture percentage, voltage, and trend history. The NSPanel on the wall shows all four at a glance — when any fern drops below its individually calibrated threshold, the icon switches to alert state. Botanical names were too long for the layout; genus names only. Nephrolepis, Adiantum, Asplenium, Phlebodium. They fit.
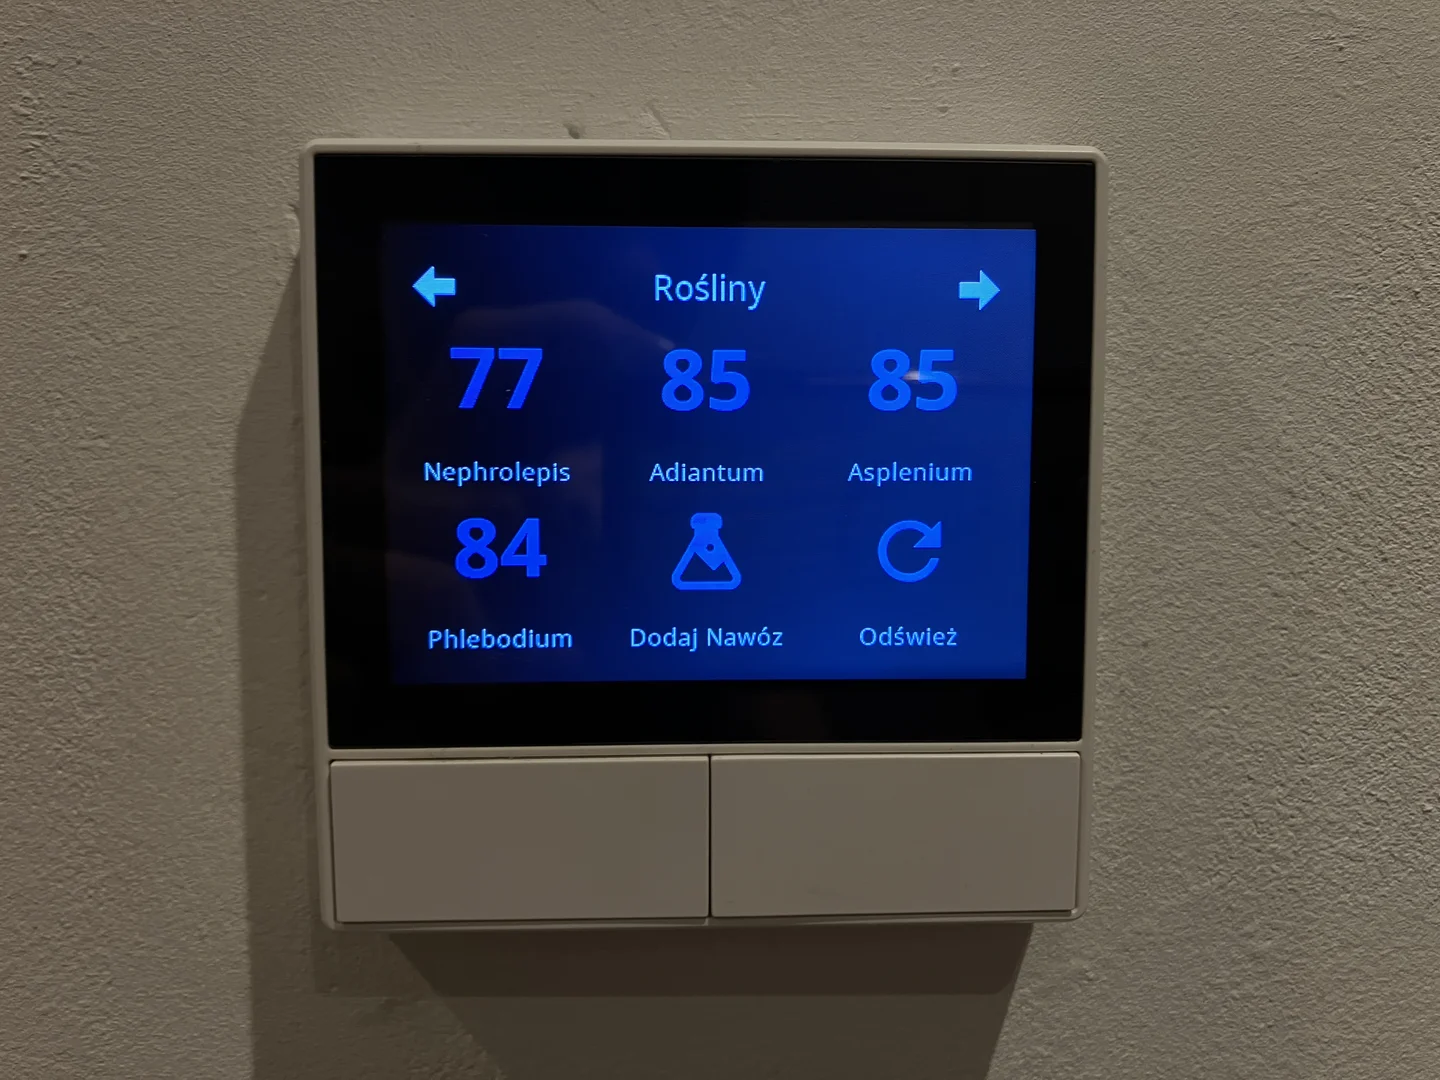
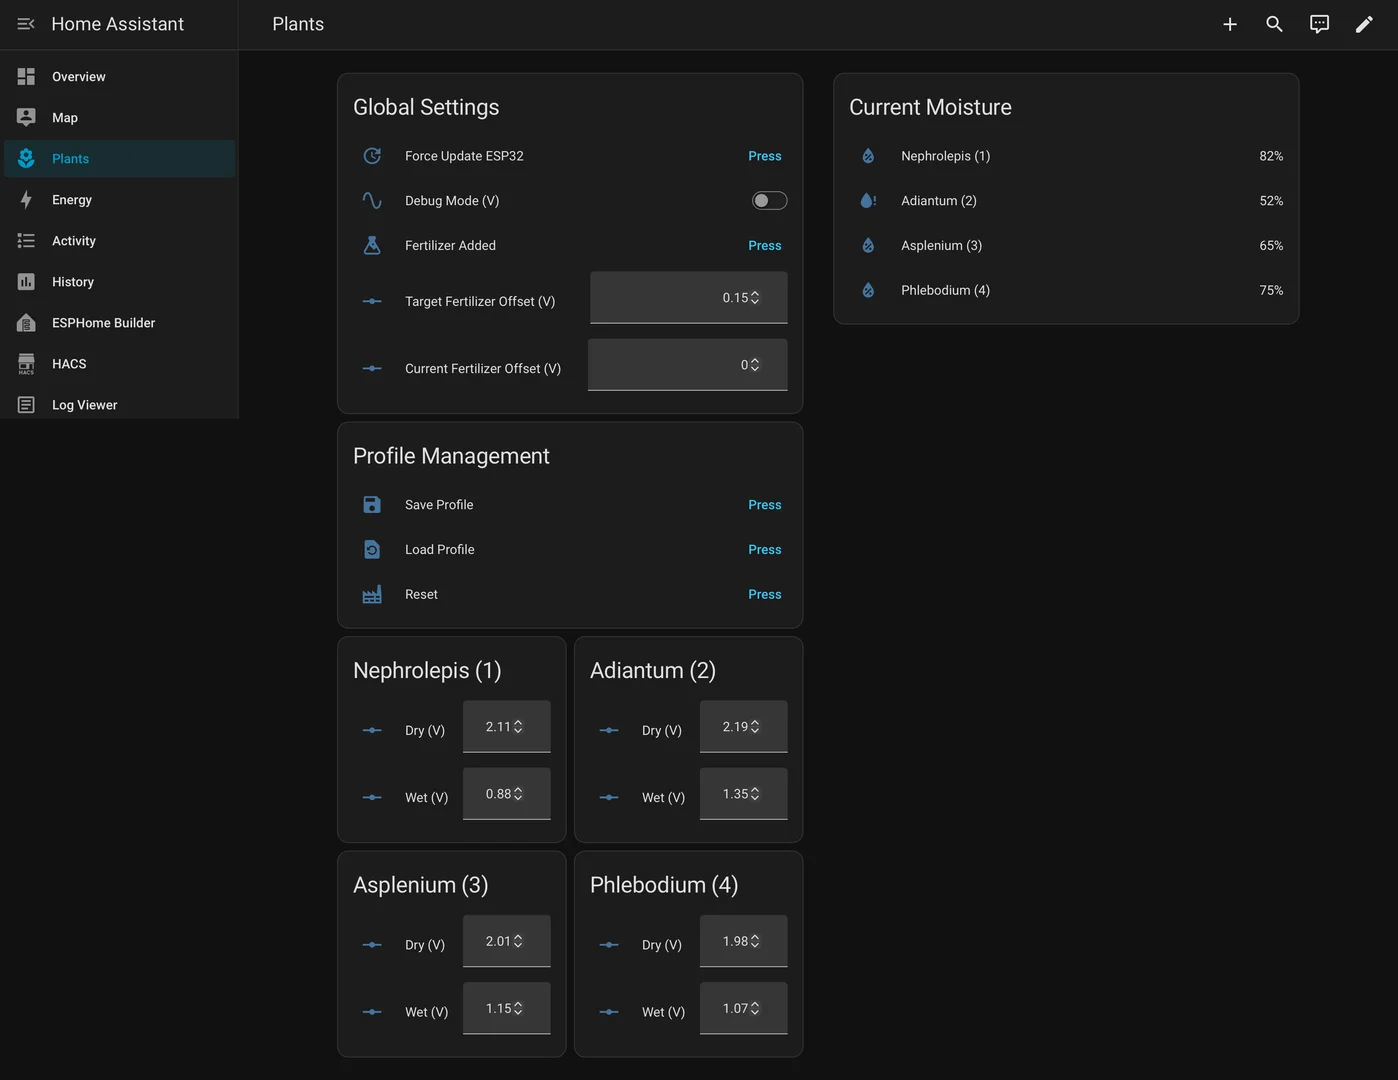
The complete dashboard configuration, Lovelace cards, and NSPanel alert icon templates are in the GitHub repository.
What This Taught Me
AI can be confidently wrong. It lowered the barrier to entry and made this project possible — and it also gave me a technically accurate description of the wrong type of sensor. Both things are true. The lesson isn't "don't use AI." It's "verify the answers that actually matter, especially when you don't yet know what you don't know."
Real-world systems don't care about your theory. Lab calibration was elegant. Real soil was messy. The cable length shifted everything. That's normal — the only fix is testing in actual conditions.
Iteration speed changes your mindset. Three minutes versus ten minutes per compilation sounds like a minor detail. It isn't. Build the feedback loop first.
Sometimes the answer is stupidly simple. Software fine. Hardware fine. Sensors reporting zero. Answer: air. Press harder. We look for the simple answers last.
And one more thing. For years I assumed "microcontroller programming" meant wrestling with processor registers in low-level C++. Instead I wrote a few dozen lines of YAML and ran one command. The logic is there — just at a higher level of abstraction. The engine exists. Your layer is the game rules. I started understanding this here, with these ferns. 🖤
For the Next Person
Full code including all three YAML files, secrets.yaml.example, Lovelace card configuration and NSPanel alert icon templates are on GitHub: github.com/noawinged/ha-plant-humidity-monitor
Adapt it for your number of plants, your soil type, the length of your cables.
One thing I'd change if starting over: use capacitive sensors, not resistive ones. The Cytron Maker Soil Moisture sensor is what I'm moving to next — isolated probes, no exposed metal corroding in acidic peat, and much less sensitivity to small air gaps in shrinking soil. Same wiring, same YAML structure, better physics.
Upcoming: The Hardware Upgrade
I don't mind saying I got misled on the sensor physics. It happens — especially when you're building something new with tools that are fast and confident even when they're wrong. What I didn't expect was how much I wouldn't mind. I built something that works. I learned what resistive sensors actually are, what capacitive sensors actually do, and exactly why the peat-shrinking problem would have been much smaller with the right hardware. That's worth something.
The next chapter is already ordered: I'm replacing all four sensors with Cytron Maker Soil Moisture capacitive sensors. No exposed metal probes sitting in acidic peat. No air-gap-induced circuit breaks. A full update post is coming — new hardware, recalibrated from scratch, and an honest comparison of what actually changed in practice.
Same ferns. Better eyes in the dirt. 🖤